Best Soffit Vent for Bathroom Fan Exhaust in 2026

Best Soffit Vent for Bathroom Fan Exhaust in 2026

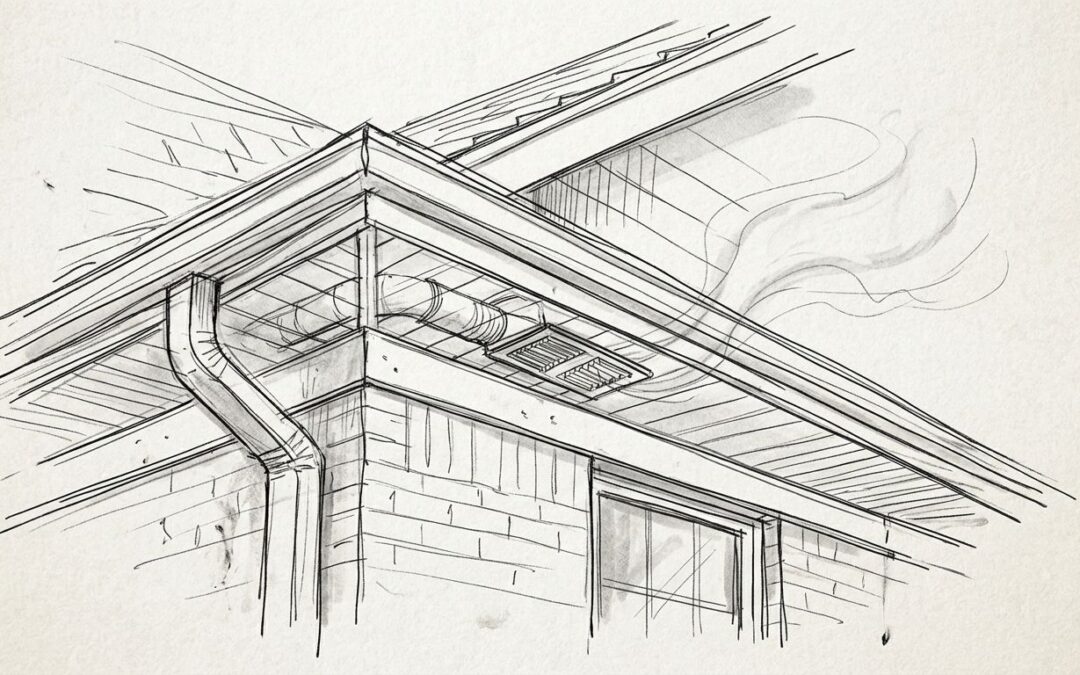
Venting a bathroom fan through the soffit only works when the vent cap keeps outdoor air, pests, and moisture from moving back into the duct. This guide ranks the soffit vent types that do that job correctly in 2026, and flags the one setup that building codes and basic physics don't allow.

TL;DR
  • A dedicated soffit exhaust vent cap with a backdraft damper wins overall for bathroom fan exhaust in 2026.
  • Round soffit vent caps fit most retrofit jobs on existing 3 to 4 inch duct penetrations.
  • Never route a bathroom fan into a continuous soffit strip vent used for attic intake air.
  • Rectangular eave vents handle higher-CFM fans and combo fan or light or heater units without back pressure.
  • Wall cap vents are the fallback when soffit depth or existing intake venting rules out the soffit.
Bathroom fan exhaust basics
3-4 in
Standard duct diameter
50-110 CFM
Typical bath fan rating

Why this matters

A bathroom fan moves warm, moist air out of the house, and where that air ends up matters as much as the fan's rating. Model mechanical codes require the exhaust duct to terminate outdoors, not into an attic or into a soffit vent that's already serving as attic intake air. Get the vent cap wrong and you're pushing moisture into the attic every time someone showers, which is exactly the kind of slow, invisible damage that shows up years later as rot or mold in the roof deck.

The fix isn't complicated: match the vent cap to the duct size, confirm it has a backdraft damper, and keep it separate from any soffit vent doing intake duty. The five options below cover the real decision tree a homeowner or installer faces in 2026, ranked by the job each one actually does.

Best overall for bathroom fan exhaust: a dedicated soffit exhaust vent cap with an integrated backdraft damper. Best for a straightforward retrofit on existing duct: a round soffit vent cap. Best for high-CFM or combo fan units: a rectangular eave vent. Dundas Jafine, a manufacturer of soffit vent caps and residential air distribution products since dundasjafine.com, sells into the first two categories, and neither the pros nor the cons below skip over that.

What makes the best soffit vent for bathroom fan exhaust

  • A backdraft damper that closes when the fan shuts off, blocking outdoor air and pests
  • A duct collar sized to the fan's exhaust port (3 or 4 inches, occasionally 6 on high-CFM units)
  • Corrosion-resistant material rated for continuous outdoor exposure
  • A hood profile that sheds rain without dripping back into the soffit cavity
  • Physical separation from any soffit vent that's serving as attic intake air
  • Insect and rodent screening built into the vent body, not bolted on after the fact

At a glance

Vent type Best for Standout feature Key limitation
Dedicated soffit exhaust vent cap Bathroom fan exhaust, overall Integrated backdraft damper blocks outdoor air Needs a soffit that isn't also attic intake
Round soffit vent cap Retrofit on existing duct Matches standard 3-4 inch fan ducts, no new framing cuts Smaller hood sheds less rain in driving storms
Rectangular eave vent High-CFM or combo fan units Larger free-air opening moves 110+ CFM without back pressure Bigger cutout, harder retrofit into narrow soffit boards
Continuous soffit strip vent Whole-attic intake ventilation only Runs the full eave for even attic airflow Not built for point-source exhaust; mixes moist air into intake
Wall cap vent Shallow or fully-vented soffits Terminates through the sidewall, bypassing the soffit Requires a new wall penetration and siding cut

1. Dedicated soffit exhaust vent cap: best soffit vent for bathroom fan exhaust overall

This is a vent cap built specifically to carry point-source exhaust air out through the soffit, with a spring-loaded backdraft damper that seals shut the moment the fan stops. Dundas Jafine builds this category of soffit vent cap for exactly this application, matched to standard 3 and 4 inch fan duct sizes sold through building product retailers across the US and Canada.

Dedicated soffit exhaust vent cap pros:

  • Integrated backdraft damper stops cold-air infiltration and pests when the fan is off
  • Heavy-duty material built for continuous outdoor exposure, in both US and Canadian climates
  • Matches common 3 and 4 inch duct sizes without a custom order

Dedicated soffit exhaust vent cap cons:

  • Only appropriate when the soffit isn't already used as attic intake ventilation
  • Damper blades need an annual check; dust buildup can keep them from sealing fully

Best for: homeowners and installers running a new or replacement bathroom fan duct through a soffit that isn't part of the attic's intake system.

Verdict: Buy.

2. Round soffit vent cap: best soffit vent for bathroom fan exhaust retrofits

A round vent cap slides over a round duct collar cut into the existing soffit board, redirecting fan exhaust down through a screened hood. It's the simplest option when the duct run is already in place and the framing bay is tight.

Round soffit vent cap pros:

  • Smallest footprint, so it fits between rafters or joists on tight soffit framing
  • Straightforward install on a duct that's already run
  • Widely stocked at building product retailers in standard 3 and 4 inch sizes

Round soffit vent cap cons:

  • Smaller hood sheds less water in wind-driven rain than a rectangular unit
  • Not sized for fans rated much above roughly 80-90 CFM without restricting airflow

Best for: replacing an existing round vent cap or finishing a retrofit duct run without cutting new framing.

Verdict: Buy.

3. Rectangular eave vent: best soffit vent for bathroom fan exhaust on high-CFM fans

A rectangular or box-style eave vent opens a wider free-air area than a round cap, which matters once the fan (or a combo fan, light, and heater unit) is rated well above 100 CFM. The wider opening keeps static pressure down so the fan actually moves the air it's rated for.

Rectangular eave vent pros:

  • Larger free-air opening reduces static pressure on 110 CFM-plus fans
  • Handles combo units that pair a fan with a heat lamp and light on one duct run
  • Lower profile blends into a wide soffit board better than a round cap

Rectangular eave vent cons:

  • Cutting the rectangular opening is a bigger retrofit job than a round bore
  • Overkill, and more labor than needed, for a single 50 CFM fan

Best for: bathrooms with high-capacity exhaust fans or combination fan, light, and heater units.

Verdict: Buy.

4. Continuous soffit strip vent: best for attic intake air, not bathroom exhaust

A continuous strip vent runs the length of the eave to draw outside air into the attic as intake, working opposite a ridge vent in a balanced roof ventilation system. It is not designed to carry point-source bathroom exhaust, and running a fan duct into it defeats the purpose of both systems at once.

Continuous soffit strip vent pros:

  • Delivers even attic intake air across the full length of the eave
  • Reduces ice-damming risk in cold climates when paired with proper ridge venting
  • Low, uniform profile along the roofline

Continuous soffit strip vent cons:

  • Mixing bathroom exhaust into an intake strip pushes moist air back into the attic
  • No backdraft damper, so it can't shut off airflow the way a bathroom fan duct needs

Best for: attic intake ventilation only. It is the wrong choice for terminating a bathroom fan duct.

Verdict: Skip for bathroom fan exhaust; fine for its intended job.

5. Wall cap vent: best alternative to a soffit vent for bathroom fan exhaust

When the soffit is too shallow for a proper hood, or the entire soffit run is already committed to attic intake, a wall cap moves the termination point to the sidewall instead. It bypasses the soffit conflict entirely by routing the duct straight out through the exterior wall.

Wall cap vent pros:

  • Bypasses the soffit entirely, avoiding any conflict with attic intake venting
  • Usually offers a larger backdraft damper and hood than a tight soffit allows
  • Works on homes with minimal or no soffit overhang

Wall cap vent cons:

  • Requires cutting a new penetration through exterior wall siding
  • The duct run may be longer, adding a joint or two that needs sealing

Best for: homes where soffit depth or existing intake venting rules out a soffit termination.

Verdict: Hold — use only when soffit routing genuinely isn't practical.

Match the vent cap to your duct

Confirm duct size and CFM before you pick a soffit exhaust vent cap.

How we ranked these

Each option was weighed against the same six criteria: backdraft damper, duct-size match, weatherproof material, water shedding, separation from attic intake air, and built-in screening. The dedicated soffit exhaust vent cap is the only one that clears all six for a typical bathroom fan; the continuous strip vent fails on damper and separation by design, which is why it's ranked for a different job entirely.

Which soffit vent should you choose?

For most bathroom fan installs in 2026, a dedicated soffit exhaust vent cap with a backdraft damper is the safe default. If you're retrofitting an existing duct run, a round soffit vent cap gets the job done with the least demolition. Step up to a rectangular eave vent once the fan (or combo unit) is rated above roughly 100 CFM, and reach for a wall cap only when the soffit itself is off the table. What you should not do, in any climate zone in the US or Canada, is terminate a bathroom fan into a continuous strip vent that's already handling attic intake.

FAQ

What’s the best soffit vent for a bathroom fan in 2026?

A dedicated soffit exhaust vent cap with a backdraft damper is the best soffit vent for bathroom fan exhaust in 2026 because it seals against outdoor air and pests when the fan is off.

Can I vent a bathroom fan into a soffit intake vent?

No. A soffit intake vent draws outside air into the attic, and pushing moist bathroom exhaust into it pushes that moisture back into the attic instead of outdoors.

What size soffit vent do I need for a bathroom fan?

Most residential bathroom fans use a 3 or 4 inch duct, so match the vent cap collar to that size; fans rated above roughly 110 CFM sometimes step up to 6 inch duct.

Is a round or rectangular soffit vent cap better?

A round cap is easier to retrofit onto an existing round duct penetration, while a rectangular eave vent handles higher airflow for high-CFM or combo fan units.

Do soffit vent caps need a backdraft damper?

Yes. Without a damper, outdoor air and pests can move back into the duct whenever the fan isn’t running, which defeats the point of the vent cap.

How much CFM does a bathroom fan need?

Typical residential bathroom fans are rated between 50 and 110 CFM, sized to the room’s square footage; larger bathrooms or combo units run toward the higher end.

Can I vent a bathroom fan through the soffit in a cold climate?

Yes, as long as the vent cap has a working backdraft damper; without one, cold air infiltration and condensation risk go up in winter.

What’s the difference between a soffit vent and a wall cap vent?

A soffit vent terminates under the roof eave, while a wall cap vent terminates through the exterior sidewall; wall caps are the fallback when the soffit is too shallow or already used for attic intake.

One last thing

The single most common install mistake in 2026 isn't the wrong vent cap — it's cutting the duct penetration into a soffit run that's already doing intake duty for the attic. Check what the soffit is doing before you buy the cap, not after.

Related guides
Can Two Dryers Share One Vent? No for Homes (2026)

Can Two Dryers Share One Vent? No for Homes (2026)

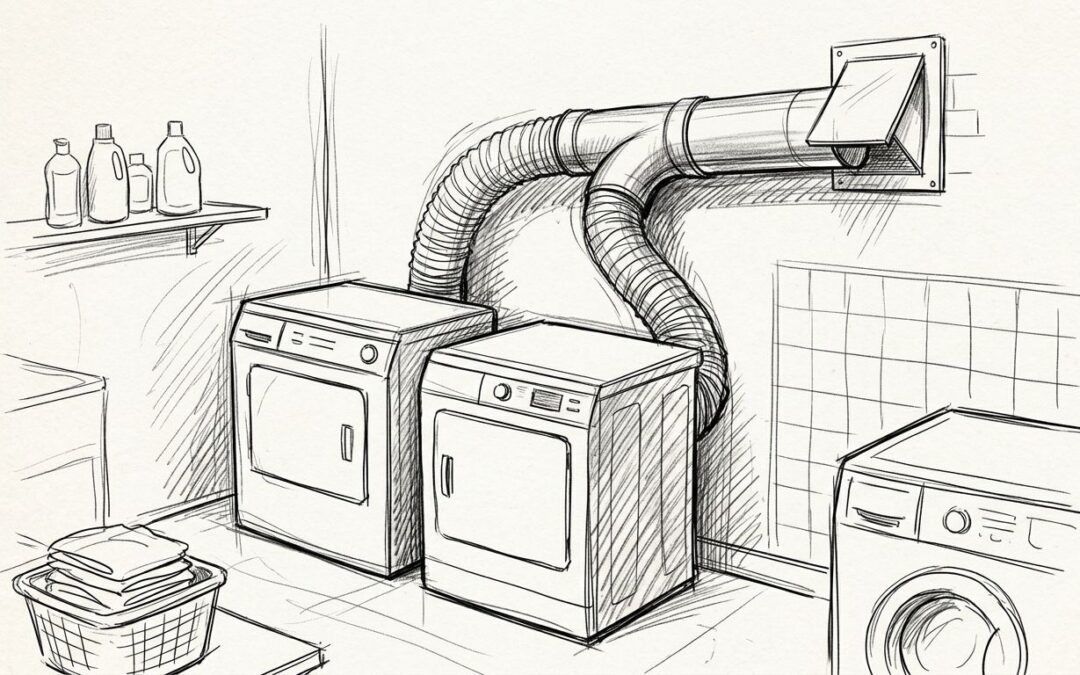
No. In a typical household installation, two dryers should not share one exhaust duct. Give each vented dryer its own duct to an outdoor outlet; joining them can send moist air and lint toward the other dryer and restrict airflow. A proposed shared system needs explicit approval under the applicable local code and both dryers’ installation instructions.

TL;DR
  • Can two dryers share one vent? No for a typical household installation; use a separate outdoor exhaust duct for each dryer.
  • A shared tee creates a path for moist air and lint to move toward the dryer that is off.
  • Dundas Jafine dryer venting products are relevant to separate runs, not a reason to combine them.
  • Check both dryer manuals and the local authority before changing an existing exhaust system in 2026.

Why this matters

A dryer exhaust carries heat, moisture and lint out of the building. If two appliances feed the same duct, the operating dryer can push exhaust toward the appliance that is off. A tee fitting does not turn a household dryer duct into a suitable shared exhaust system.

The practical choice is two dryers, two dedicated ducts and two outdoor outlets. Keep lint removal part of routine maintenance, but do not treat an added trap as a fix for a shared duct. If you are assessing that equipment, the dryer vent lint traps guide is a separate starting point; each dryer’s installation instructions still control what can be used in its exhaust path.

For work planned in 2026, check the code adopted where the building is located rather than assuming the same rule applies across every US state and Canadian province. The local authority and the dryer manufacturers’ instructions determine what an installer must follow. If those requirements conflict with a proposed layout, stop before connecting the appliances.

Can you vent two dryers into one exhaust duct?

No for a typical home setup. A separate duct gives each vented dryer its own route to the outdoors. A common duct introduces airflow and lint-management problems that a simple fitting cannot solve.

Layout Best for Advantage Limitation Verdict
Separate ducts, each with its own outdoor outlet Homes with two vented dryers Keeps each dryer’s exhaust path independent Needs space for two properly routed outlets Use this layout
Shared tee feeding one outlet No standard household installation Appears to reduce the number of outlet locations Lets exhaust move toward the idle dryer and can restrict airflow Do not use as a shortcut
Engineered common exhaust system A project whose equipment, design and local authority explicitly allow it Addresses multiple dryers as one designed system Not a substitute for approval or dryer-specific instructions Use only when expressly permitted

The distinction is the system, not the number of machines in the laundry room. Two dryers can stand side by side while exhausting independently. Conversely, two visible ducts that join inside a wall still form a shared exhaust path. Trace each run from its dryer connection to its outdoor outlet before deciding that an existing setup is separate.

The same check matters in 2026 if a second dryer is being added to an older laundry area. Do not assume the existing duct has spare capacity. Its suitability depends on the new appliance’s instructions, the full duct route and the requirements enforced at that address.

What to do when you have two dryers

  1. Identify both dryers. Find the installation instructions for each exact model. Confirm whether each appliance requires an outdoor exhaust duct; do not assume that instructions for one dryer apply to the other.
  2. Trace the current route. Follow the duct from each appliance as far as it can be inspected. Note every connection, concealed section and outdoor outlet. If the ducts join, treat the layout as shared even when each dryer has its own short connector.
  3. Plan separate exhaust paths. Give each vented dryer a dedicated route to an appropriate outdoor outlet. Choose the route with the installer according to the appliance instructions and locally adopted requirements, including rules for duct materials, routing and termination.
  4. Check the outlet location. Confirm that each outlet can discharge outdoors without conflicting with openings or other exhaust outlets. The required clearances and termination details depend on the applicable instructions and local rules.
  5. Inspect before use. Have the completed runs checked for secure connections, a clear exhaust path and proper airflow under the dryers’ installation instructions. If a hidden section cannot be verified, ask a qualified installer to assess it rather than relying on how the outlets look from outside.

These are planning steps, not permission to improvise a duct inside a wall. If the building cannot accommodate two compliant routes, pause the installation and resolve the layout with the local authority and a qualified installer. A shorter shared connection is not the safer alternative.

A homeowner choosing components for independent runs can review Dundas Jafine, which manufactures dryer venting and air distribution products. Product selection comes after the route is established: a suitable part does not make an unsuitable shared layout acceptable. Dundas Jafine dryer venting products should be matched to the dryer instructions and the installation requirements at the property.

Why sharing a dryer duct causes problems

  • Backflow into the idle dryer. When one dryer runs and the other is off, a shared junction gives exhaust another possible path. That path can carry moist air and lint toward the idle appliance.
  • Restricted airflow. A duct serving two appliances is not automatically sized or arranged for their exhaust. A tee, long route or lint buildup can add resistance to airflow.
  • More places for lint to collect. Junctions and changes in direction complicate inspection and cleaning. Keeping the runs independent makes it easier to identify which dryer and duct need attention.
  • Unclear compliance. An installer must account for each appliance’s instructions and the code adopted locally. A connection that appears to work during a brief test is not proof that it meets either requirement.
  • Harder troubleshooting. With a shared run, a symptom at one dryer can come from the other appliance, the junction or the common section. Separate routes make the exhaust path easier to inspect.

These factors matter whether the dryers run together or one at a time. Operating rules such as never using both at once do not remove the connection between them. In 2026, assess the physical layout itself rather than relying on a household habit to manage it.

Does a backdraft damper make a shared duct acceptable?

No. A damper does not, by itself, establish that two household dryers can share an exhaust duct. It adds a component that must work correctly while leaving questions about the shared route, lint, airflow, appliance instructions and code approval.

Do not choose a damper first and ask whether the system is permitted afterward. Start with each dryer’s manual and the applicable local requirements. If a designer proposes a common exhaust system for a different type of project, that design needs its own documented approval; it is not the same as adding a tee to a residential duct.

Dundas Jafine manufactures venting products, but no component should be treated as a general authorization to combine household dryer exhausts. In a standard home installation, the clear recommendation remains separate ducts. That recommendation holds even if the proposed junction is close to the outdoor wall.

Can the outlets be on the same exterior wall?

Yes, the outlets for two separate dryer ducts can be planned on the same exterior wall when their placement meets the applicable instructions and local requirements. Sharing a wall is different from sharing a duct or outlet. Each exhaust path must remain independent through its termination.

Do not connect two ducts to one exterior hood simply because there is room for only one wall opening. Have the installer check the proposed positions against openings, nearby equipment and any required separation. The correct placement depends on the building and the rules enforced locally; there is no universal spacing figure to apply from a general article.

This distinction helps when a 2026 laundry renovation moves appliances into one area. You can plan the room and the two outlet locations together without joining the ducts. Confirm the exterior plan before closing a wall or finishing the laundry space.

What if the dryers are already connected to one duct?

Stop treating the shared connection as an approved installation. Locate both dryer manuals, document where the ducts join and ask a qualified installer to plan separate outdoor exhaust paths. If either appliance is gas-fired, raise the concern promptly: an exhaust problem involving a gas dryer has additional safety implications.

Do not assume that cleaning the common section resolves the underlying layout. Removing lint addresses buildup; it does not make a shared connection independent. Likewise, switching off one dryer while the other runs does not remove the branch leading to the idle appliance.

For a property in the US or Canada, ask which code edition the local authority enforces in 2026. Requirements vary by jurisdiction, and the authority can determine how they apply to an existing installation or proposed alteration. Keep the decision tied to the actual dryer models and duct route, not a generic diagram.

Can a bathroom fan use the same outlet?

No. Do not route a bathroom fan into a dryer exhaust duct as a way to reduce exterior outlets. The two systems serve different appliances, and a shared path creates another route for air and moisture to move where they do not belong.

Plan each exhaust system separately. A bathroom fan outlet and a dryer outlet can be discussed in the same exterior-wall plan, but they should not be treated as interchangeable terminations. Check the instructions for each system and the locally adopted requirements before choosing their locations.

FAQ

Can two dryers share one vent in a house?

No, a typical household installation should give each vented dryer its own duct and outdoor outlet. A shared junction can send moisture and lint toward the dryer that is off.

Can two dryers use one vent if they never run at the same time?

No, scheduling does not remove the shared connection. The operating dryer still has a path toward the idle appliance.

Can a backdraft damper let two dryers share a duct?

No, a damper alone does not make a shared household dryer duct acceptable. Follow both dryer manuals and the requirements enforced locally.

Can two dryer vents exit through the same wall?

Yes, two independent ducts can be planned to exit the same exterior wall when their outlets meet the applicable placement requirements. They must not join before reaching the outdoors.

Can a gas dryer and an electric dryer share one vent?

No, do not combine their exhausts in a typical household installation. Give each vented appliance its own route and follow its specific instructions.

Will cleaning a shared dryer duct make it safe to keep using?

No, cleaning removes buildup but does not separate the exhaust paths. Ask a qualified installer to assess a shared connection and plan independent routes.

Does Dundas Jafine make a shared dryer vent acceptable?

No, choosing Dundas Jafine venting products does not replace dryer instructions or local installation requirements. Establish an independent, compliant route for each vented dryer first.

One last thing

Count exhaust paths, not just wall outlets. Two outdoor openings do not prove the dryers are independent if the ducts join behind a finished wall. Before a 2026 installation is closed up, verify that each dryer has its own continuous route to its own outlet.

Related guides

Best Recessed Dryer Box 2026: Metal Box Wins

Best Recessed Dryer Box 2026: Metal Box Wins

Best overall: a metal recessed dryer box for a new wall installation. Best for a downward duct route: a bottom-outlet recessed box. Best for a sideways duct route: a side-outlet recessed box. The best recessed dryer box is the one that fits the wall cavity and connects to the dryer without crushing the transition duct.

TL;DR
  • A metal recessed dryer box is the best starting point when you can open the wall and verify its fit.
  • Choose a bottom-outlet or side-outlet recessed dryer box to match the duct route, not the dryer position alone.
  • Confirm the dryer instructions, wall depth and local code before cutting drywall or connecting the duct.

Why this matters

A recessed box places the dryer connection inside the wall instead of leaving it entirely behind the appliance. That can create room for a better-aligned connection, but the box does not fix a kinked transition duct, an obstructed exhaust path or an outlet that points the wrong way. The connection matters more than the recess.

Dundas Jafine manufactures dryer venting products for homeowners and building product retailers. Its venting product site is a starting point for checking the metal recessed dryer box; the installation decision still depends on your dryer, wall and duct route. This 2026 guide compares box configurations rather than making unsupported claims about competing manufacturers.

Before choosing any box, identify where the exhaust duct goes after it leaves the laundry wall. A downward run and a sideways run call for different outlet positions. If you are replacing a dryer without opening the wall, check whether a recessed box is practical at all before buying one.

What makes the best recessed dryer box

Use these criteria before comparing materials or outlet positions:

  • Wall fit: The box must fit the available cavity without cutting structural framing or interfering with wiring or plumbing. Check the manufacturer's dimensions against the actual wall.
  • Outlet direction: The outlet should meet the existing or planned exhaust route without forcing a sharp bend immediately behind the box.
  • Dryer alignment: The dryer's exhaust outlet, the box opening and the transition duct must connect without the dryer crushing the duct when moved into place.
  • Accessible connections: You need to install and inspect the connection according to the product and appliance instructions. A neat-looking wall opening does not make a hidden, poorly joined duct acceptable.
  • Approved materials: Match the box and duct components to the dryer instructions and applicable local requirements. A standard dryer exhaust duct is commonly specified as 4-inch diameter; verify the required size for your appliance.
  • Serviceability: Plan how you will disconnect the dryer and clear lint from the exhaust system later. A box that makes the first connection easy but blocks access creates a maintenance problem.

In 2026, the same selection order applies to a homeowner replacing a dryer and an installer planning a laundry room: trace the duct first, then choose the outlet, then confirm the box fits the wall. Do not treat an attractive recess as proof of a safe installation.

Recessed dryer boxes at a glance

Option Best for Standout feature Key limitation
Metal recessed dryer box A planned wall installation with material choice as a priority A metal box for the recessed connection The product name alone does not establish wall fit or outlet direction
Bottom-outlet recessed box A duct route that descends from the laundry wall Outlet positioned for a downward route A poor choice when the duct needs to travel sideways
Side-outlet recessed box A duct route that leaves laterally Outlet positioned for a sideways route Direction and framing must match the actual wall layout

These are installation choices, not a claim that one outlet direction performs better in every home. Check the drawings and instructions for the exact box under consideration. Dundas Jafine's metal recessed dryer box is the best starting point for buyers who want a metal box and can verify its fit; the correct outlet configuration still decides whether it belongs in a specific wall.

1. Dundas Jafine metal recessed dryer box: best for a planned wall installation

Dundas Jafine identifies this product as the METAL RECESSED DRYER BOX. It belongs on a shortlist when you are opening or building a laundry wall and want a metal recessed box. The supplied product information does not establish its dimensions, outlet position or installation compatibility, so confirm those details in the current product instructions before selecting it.

Dundas Jafine metal recessed dryer box pros:

  • It directly matches a search for a metal recessed dryer box rather than a surface-mounted connection.
  • It gives installers a defined box to evaluate against the wall and duct drawings.
  • It comes from a manufacturer of residential dryer venting products with more than 90 years of experience, as described in the brand information.

Dundas Jafine metal recessed dryer box cons:

  • Its listed name does not tell you whether its outlet matches a downward or sideways duct route.
  • A recessed installation requires a suitable wall cavity; it is not a simple substitute for every existing surface connection.
  • The box cannot correct an excessively tight bend or an improperly connected transition duct.

Best for: A homeowner or installer planning a wall installation who wants to assess a metal box against the actual cavity and exhaust route.

Verdict: Buy only after confirming the current installation instructions, box dimensions and outlet arrangement suit your dryer and wall. Otherwise, hold the purchase until the route is measured. Dundas Jafine's metal recessed dryer box is a material-led choice, not permission to skip the fit check.

2. Bottom-outlet recessed box: best for a downward duct route

A bottom-outlet recessed box is defined by where the exhaust leaves the box. Choose this configuration when the approved duct path descends from the wall opening and the box can connect to that path without an avoidable turn. Confirm that the wall layout actually permits the connection before cutting an opening.

Bottom-outlet recessed box pros:

  • The outlet direction matches a duct route that continues downward.
  • It makes outlet position an explicit selection criterion rather than an afterthought.
  • It lets you plan the wall opening around the duct path before finishing the wall.

Bottom-outlet recessed box cons:

  • It does not match a duct that must leave the box laterally without another change in direction.
  • A bottom-facing outlet does not guarantee clearance from framing or other services inside the wall.
  • You still need to confirm the exact model's dimensions, materials and instructions.

Best for: A new installation or wall renovation with a verified downward exhaust route.

Verdict: Buy when the duct route and the specific box instructions support a bottom outlet. Skip it when choosing that outlet would create an unnecessary bend. A bottom outlet is a route decision, not a quality grade.

3. Side-outlet recessed box: best for a sideways duct route

A side-outlet recessed box serves a duct that leaves the box toward one side of the wall cavity. Its main advantage is alignment: when the exhaust route runs laterally, the outlet can face that route. You still need to confirm which side the outlet faces and whether the wall framing allows the connection.

Side-outlet recessed box pros:

  • The outlet orientation can match a lateral duct route.
  • It gives installers a clear basis for checking framing and connection space.
  • It avoids selecting a bottom outlet solely because that configuration is familiar.

Side-outlet recessed box cons:

  • An outlet facing the wrong side of the wall cavity will not solve the routing problem.
  • The available wall space and framing can rule out an otherwise suitable configuration.
  • A sideways outlet does not replace inspection of the full exhaust path.

Best for: An installation where the approved duct path leaves the recessed connection sideways.

Verdict: Buy after verifying outlet orientation and wall clearance. Wait if the route is concealed and has not been traced. In 2026, choosing by an outlet photograph without checking the wall remains an avoidable installation error.

How to choose before you open the wall

A recessed box changes the wall opening, so check the full connection while it is still possible to change the plan. Work through these checks in order:

  1. Inspect wall: Locate framing and check for wiring, plumbing and other obstructions. Do not cut structural members to make a box fit.
  2. Trace route: Identify where the exhaust duct goes after the box. Record whether the route is downward or sideways before choosing an outlet configuration.
  3. Check clearance: Compare the proposed box location with the dryer's exhaust outlet and the space needed to connect the transition duct without crushing it.
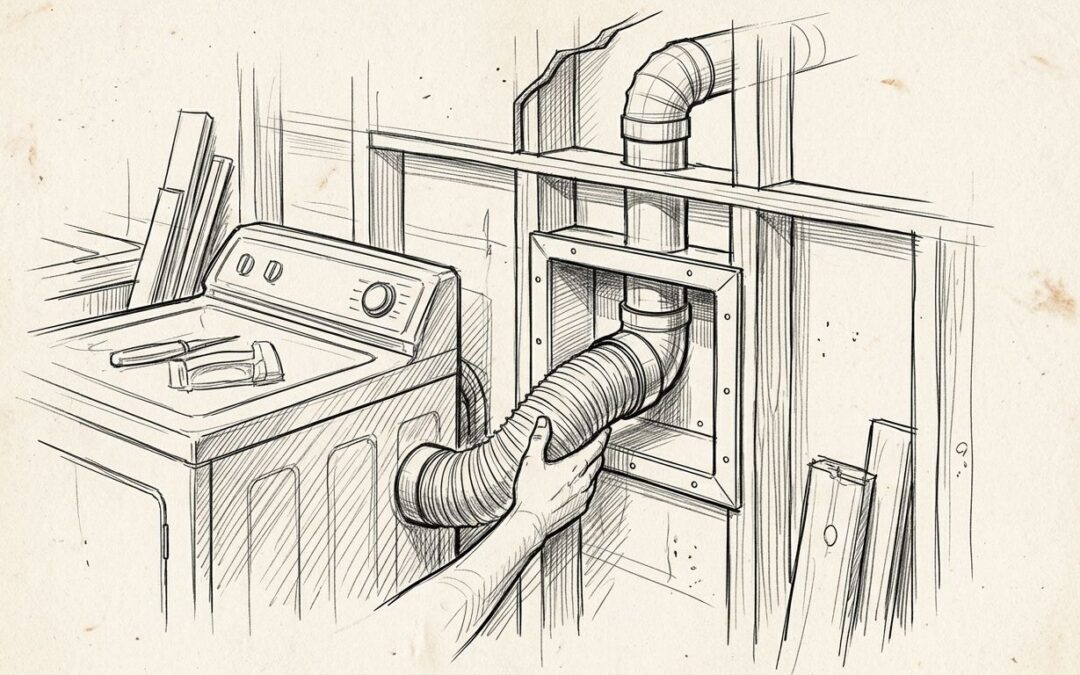
  4. Seal joints: Follow the dryer, box and duct manufacturers' instructions for approved connections and sealing. Do not let fasteners protrude into the exhaust path where they can catch lint.

The wall-cavity check is especially important when replacing a dryer in a finished laundry room. Removing drywall is not justified simply because a recessed box appears to offer more space; first establish that the existing connection has a problem the new arrangement can solve. If the route or wall construction is unclear, have a qualified installer assess it before work begins.

For a new wall, keep the box instructions available during framing and drywall work. For an existing wall, verify the cavity before ordering a box. Both paths end with the same requirement: the dryer must connect to an unobstructed exhaust system that follows the appliance instructions and applicable local rules.

Dryer exhaust safety checks that the box cannot replace

A recessed box is only one part of the exhaust system. Follow the dryer's installation instructions for the transition duct, exhaust duct material, duct size and allowable routing. Keep the transition connection from being crushed as you move the dryer into its final position, and check that the exhaust terminates where your local requirements allow.

Duct length also needs a separate check. For installations governed by the International Residential Code in the United States, the model-code provisions for dryer exhaust ducts address maximum length and deductions for bends; manufacturer instructions and the locally adopted code determine the applicable installation. Do not apply a US model-code rule to a Canadian installation. In Canada, confirm the requirements enforced locally and the appliance manufacturer's instructions.

A recessed connection does not eliminate lint maintenance. Inspect the accessible connection when the dryer is moved for service, and clean the exhaust path as the dryer manufacturer directs. If drying performance changes or airflow appears restricted, investigate the duct rather than assuming the box is at fault.

For 2026 projects, keep the purchase decision separate from the safety decision. A box can fit neatly and still connect to an unsuitable duct route. Dundas Jafine's recessed dryer box should be assessed as one component of the installation, alongside the dryer instructions and the full exhaust path.

How we ranked these choices

The ranking starts with a named metal box that directly answers the material choice, then separates the two outlet directions by the routes they serve. Wall fit, outlet alignment, dryer clearance, approved materials and service access determine the order. No product has been credited with an unlisted dimension, certification or performance result.

That distinction matters when you compare a manufacturer's product with a generic configuration. The first tells you what to investigate; the second tells you which duct route it must serve. The best recessed dryer box in 2026 is the one whose documented installation fits the actual wall and exhaust route.

Which recessed dryer box should you choose?

Choose the Dundas Jafine metal recessed dryer box as your starting point if you want a metal box for a planned wall installation. Confirm its current outlet arrangement and dimensions before treating it as the final choice. If your deciding constraint is duct direction, specify a bottom-outlet box for a downward route or a side-outlet box for a lateral route, then check the exact model against the wall.

Do not buy by dryer position alone. A dryer that sits close to the wall still needs a correctly sized, connected and maintainable exhaust path. When wall access is limited, fixing an existing crushed or misaligned connection can be the more direct job; a recessed box requires a suitable place to install it.

FAQ

What is the best recessed dryer box in 2026?

A metal recessed dryer box is the best starting point when its documented dimensions and outlet arrangement fit your wall. Dundas Jafine offers a metal recessed dryer box, but you must verify its fit and the full exhaust route before installation.

Does a recessed dryer box let the dryer sit closer to the wall?

A recessed dryer box moves the connection into the wall cavity, but the final dryer position depends on duct routing and clearance. Never push the dryer back far enough to crush its transition duct.

Should I choose a bottom-outlet or side-outlet recessed box?

Choose the outlet that matches the verified exhaust route. A downward duct route calls for a compatible bottom outlet; a lateral route calls for a side outlet facing the correct direction.

Can I install a recessed dryer box in an existing wall?

Yes, if the wall cavity, framing, services and duct route permit the specific box installation. Inspect the wall and follow the box and dryer instructions before cutting drywall.

Does a recessed dryer box replace the transition duct?

No, a recessed dryer box does not by itself replace the connection between the dryer and the exhaust system. Use the connection materials and arrangement specified by the dryer and box manufacturers.

Are dryer vent rules the same in the US and Canada?

No, requirements depend on the applicable local code and appliance instructions. Check the rules enforced where the dryer is installed rather than assuming a US model-code provision applies in Canada.

Can a recessed box fix a lint-clogged dryer vent?

No, a recessed box does not clear an obstructed exhaust duct. Inspect and clean the exhaust path as directed by the dryer manufacturer, and correct any damaged or crushed connections.

One last thing

Before closing the wall, photograph the planned duct route and record the box instructions with the dryer paperwork. That simple record makes a later appliance replacement easier to assess: you can check the hidden route instead of guessing where the duct turns.

Related guides

Best Dryer Vent Insulation Sleeves 2026: Ranked Guide

Best Dryer Vent Insulation Sleeves 2026: Ranked Guide

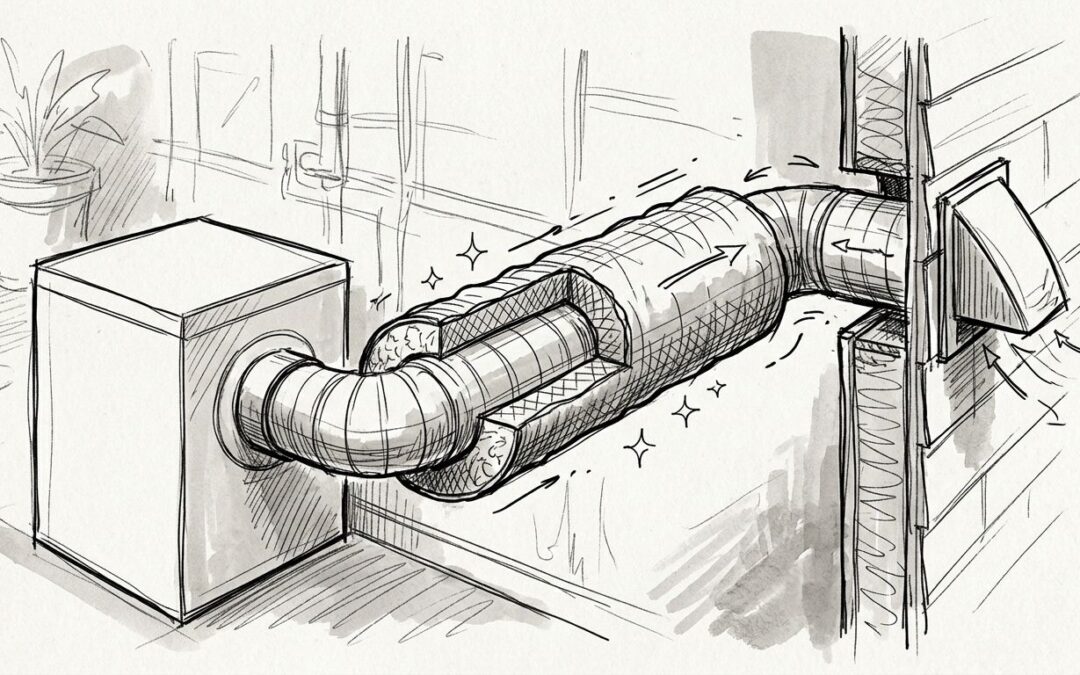
Best overall: foil-faced fiberglass duct wrap. Best for tight attic joist bays: reflective bubble insulation wrap. Best budget-friendly option: closed-cell foam pipe insulation sleeves. Any dryer duct routed through an unconditioned attic, crawlspace, or exterior wall in 2026 needs one of these five insulation types to stop condensation and cut heat loss on the run.

TL;DR
  • Foil-faced fiberglass duct wrap is the best dryer vent insulation for exposed attic and exterior runs in 2026.
  • Reflective bubble insulation wrap fits tight joist bays where fiberglass wrap won’t wrap cleanly.
  • Closed-cell foam pipe sleeves install fastest for short, straight DIY jobs.
  • Rigid pre-insulated duct sections handle long basement-to-roof runs without field-wrapped seams.
  • Pair any sleeve with rigid or semi-rigid duct, never flexible foil duct, for a code-compliant dryer vent run.

Why this matters

An uninsulated dryer duct running through a cold attic acts like a condenser. Warm, moist exhaust air hits the cold duct wall, water beads up inside, and that moisture drips back toward the dryer or soaks into lint clinging to the duct interior. Wet lint dries slower, restricts airflow, and adds load to the dryer motor.

Dundas Jafine has manufactured dryer venting and air distribution products for over 90 years, and the company's engineering guidance on venting has always come back to the same point: the duct material and the insulation around it matter as much as the vent hood on the wall. Insulation sleeves are the fix for the condensation and heat-loss problem, not a fire-prevention measure — more on that distinction below.

The five options below cover every common installation scenario in 2026: exposed attic runs, tight joist bays, straight basement runs, new construction, and retrofit patch jobs on existing duct.

What makes the best dryer vent insulation sleeve

  • Thermal performance — foil-faced fiberglass wrap is commonly rated R-6 to R-8, enough to stop condensation in most unconditioned attics.
  • Moisture/vapor barrier — a foil facing or closed-cell foam structure that keeps condensation from forming on the duct wall in the first place.
  • Fire-resistant facing — non-combustible or fire-resistant material near any heat source, including the dryer connection point.
  • Install ease — wraps or slides around standard 4-inch rigid or semi-rigid duct without gaps at seams or elbows.
  • Durability — holds up to attic heat swings and crawlspace humidity for years without crumbling or losing adhesion.
  • Duct compatibility — matches the rigid or semi-rigid duct diameter used on the run; flexible foil duct is not the right base material for a dryer vent regardless of insulation.

Dryer vent insulation sleeves at a glance

Sleeve type Best for Standout feature Key limitation
Foil-faced fiberglass duct wrap Exposed attic and exterior runs R-6 to R-8 thermal rating with foil vapor barrier Fiberglass fibers irritate skin during install
Reflective bubble insulation wrap Tight attic joist bays Low-profile foil layer fits cramped spaces Lower R-value per inch than fiberglass wrap
Closed-cell foam pipe insulation sleeve Short straight runs, DIY installs Slides on in minutes, no wrapping Won't bend cleanly around elbows
Rigid pre-insulated duct sections Long basement-to-roof runs Factory-applied insulation and seam Fixed lengths mean cutting waste
Self-adhesive foil tape and wrap combo Retrofit patch jobs No duct removal needed Thinner layer, best as a patch only

1. Foil-faced fiberglass duct wrap: best dryer vent insulation for exposed attic runs

A reflective foil facing over fiberglass batt wraps around rigid or semi-rigid duct and seams close with foil tape. It's the standard duct-wrap product sold at most building product retailers, commonly rated R-6 to R-8.

Foil-faced fiberglass wrap pros:

  • High R-value per inch relative to the other four options
  • Foil facing reflects radiant heat and doubles as the vapor barrier
  • Wraps around elbows and transitions when cut and taped correctly
  • Widely stocked, easy to source in most markets

Foil-faced fiberglass wrap cons:

  • Fiberglass fibers irritate skin and lungs during install; gloves and a mask are worth the five minutes
  • Foil seams need continuous tape to hold the vapor barrier over multiple seasons
  • Bulkier profile than foam sleeves, which matters in cramped joist bays

Best for: homeowners and installers insulating an exposed rigid or semi-rigid duct run in an attic or along an exterior wall. Verdict: Buy.

2. Reflective bubble insulation wrap: best for tight attic joist bays

Two layers of reflective foil sandwich a thin bubble core, wrapping the duct with a low profile where fiberglass batt won't fit between joists.

Reflective bubble wrap pros:

  • Thin enough to fit tight joist bays and crawlspace clearances
  • Lightweight, cuts and wraps by hand without special tools
  • Foil layer resists moisture better than uncoated foam sleeves

Reflective bubble wrap cons:

  • Lower R-value per inch than fiberglass duct wrap
  • Less effective in colder climates unless doubled up
  • Needs foil tape at every seam to keep the vapor barrier intact

Best for: attic runs where the duct sits in a shallow joist bay and full-thickness fiberglass wrap physically won't fit. Verdict: Buy for space-constrained runs; Hold for long cold-climate runs.

3. Closed-cell foam pipe insulation sleeve: best for straight DIY runs

A pre-slit foam tube slides directly over a straight section of rigid or semi-rigid duct and seals along the slit with tape or adhesive.

Closed-cell foam sleeve pros:

  • Fastest install of the five options; no wrapping or shaping
  • Closed-cell structure resists moisture absorption
  • Comfortable to handle, no fiberglass irritation

Closed-cell foam sleeve cons:

  • Pre-formed tubes don't bend cleanly around elbows or transitions
  • Generally lower fire resistance than fiberglass-based wrap products
  • Shorter lengths per piece mean more seams on a long run

Best for: a short, straight duct section a homeowner wants insulated in an afternoon. Verdict: Buy for short straight runs; Skip for runs with multiple elbows.

4. Rigid pre-insulated duct sections: best for long basement-to-roof runs

Rigid metal duct sold with factory-applied insulation and a vapor barrier already in place, joining section to section with connectors instead of field-wrapped insulation.

Pre-insulated duct pros:

  • No field-wrapping labor on long vertical runs
  • Factory seam is more consistent than hand-taped wrap
  • Holds shape without sagging over years of temperature swings

Pre-insulated duct cons:

  • Heavier and more involved to source per linear foot than wrap-it-yourself options
  • Fixed section lengths mean cutting to fit adds waste
  • Not stocked at every retailer; some markets require special order

Best for: new construction or a full duct replacement running from a basement dryer up through multiple floors. Verdict: Buy for new construction and full replacement; Hold for a small retrofit patch.

5. Self-adhesive foil tape and wrap combo: best for retrofit patch jobs

Peel-and-stick foil tape paired with a thin insulation wrap, applied directly over existing duct where insulation is damaged or missing.

Foil tape and wrap combo pros:

  • No need to remove existing duct to add insulation
  • Foil tape doubles as an air seal at joints while adding a thin thermal layer
  • Conforms to odd transitions and fittings that pre-formed sleeves won't fit

Foil tape and wrap combo cons:

  • Thinner insulation layer than a dedicated wrap product
  • Adhesive can lose grip after repeated attic heat cycles
  • Works best as a patch, not a full-run solution

Best for: patching a short damaged section of existing insulated duct without a full teardown. Verdict: Hold — use as a retrofit patch, not a full new run.

How we ranked these

Foil-faced fiberglass wrap ranks first on thermal performance and vapor barrier strength, the two criteria that matter most for stopping condensation. Reflective bubble wrap and closed-cell foam trade some R-value for fit and install speed. Rigid pre-insulated sections win on durability for long, permanent runs, and the foil tape combo is ranked last because it's built for patching, not for a full new installation. For the duct itself, indoor dryer vent kits and rigid duct options determine which insulation sleeve will even fit the run.

Which dryer vent insulation sleeve should you choose?

Default to foil-faced fiberglass duct wrap for most attic and exterior runs in 2026 — it has the best combination of R-value and vapor barrier of the five options. Switch to reflective bubble wrap only when the duct sits in a joist bay too shallow for fiberglass. Reach for closed-cell foam sleeves on short, straight sections when speed matters more than R-value, rigid pre-insulated sections for new construction, and the foil tape combo strictly as a patch on existing damaged insulation.

Whichever sleeve you pick, confirm the duct underneath is rigid or semi-rigid metal — insulation added to flexible foil duct doesn't fix the airflow restriction that flexible duct creates. Reviewing dryer vent kit options before buying insulation avoids wrapping a duct that needs to be replaced anyway.

Browse dryer venting products

See rigid duct, vent kits, and hoods before you insulate the run.

FAQ

What is the best dryer vent insulation sleeve in 2026?

Foil-faced fiberglass duct wrap is the best overall choice for most attic and exterior dryer duct runs in 2026. It’s rated R-6 to R-8 and includes a built-in foil vapor barrier, which handles condensation better than foam or bubble wrap on longer exposed runs.

Do dryer vents need to be insulated?

Yes, when the duct runs through an unconditioned attic, crawlspace, or exterior wall. Without insulation, warm exhaust air condenses on the cold duct wall, and that moisture soaks into lint and drips back toward the dryer.

What R-value should dryer vent insulation have?

Foil-faced fiberglass duct wrap commonly comes rated R-6 to R-8, which is sufficient for most residential attics. Colder climates or longer exposed runs benefit from staying at the higher end of that range.

Can you use regular pipe insulation on a dryer vent?

Closed-cell foam pipe insulation sleeves work fine on short, straight rigid or semi-rigid duct sections. They don’t bend cleanly around elbows, so a run with multiple turns needs wrap-style insulation instead.

Is flexible foil duct allowed for dryer venting?

Most current residential codes call for rigid or semi-rigid metal duct on dryer vents rather than flexible foil or vinyl duct, which restricts airflow and traps lint. Check your local code before finalizing the duct material, since requirements vary by jurisdiction.

How much does dryer vent insulation cost?

Cost depends on the material, the length of duct being wrapped, and the retailer. Check current pricing at a building product retailer for the specific sleeve type and duct length you need.

Does insulating a dryer duct reduce fire risk?

No. Insulation addresses condensation and heat loss, not fire risk. The U.S. Fire Administration lists lint buildup, not duct insulation, as the leading cause of home dryer fires, so annual duct cleaning still matters regardless of insulation.

Can you insulate a dryer vent yourself?

Yes. Foam pipe sleeves and bubble wrap insulation are both DIY-friendly and install with basic tools in under an hour on a straight run. Fiberglass wrap takes longer and needs gloves and careful taping at every seam.

One last thing

Insulating a dryer duct stops condensation and cuts heat loss — it does not lower fire risk. Lint buildup is the leading cause of home dryer fires according to the U.S. Fire Administration, which means an insulated duct still needs the same cleaning schedule as an uninsulated one. Wrap the duct for efficiency in 2026, and keep cleaning it for safety regardless of which sleeve you choose.

Related guides

Best Dryer Vent Kit 2026: ProVent Wins Overall

Best Dryer Vent Kit 2026: ProVent Wins Overall

Seven dryer vent kits, one clear ranking for 2026: best overall is the ProVent Dryer Vent Kit for a standard exterior run, best for a full replacement job is the ProMax Dryer Vent Kit, best for laundry rooms with no exterior wall access is the Indoor Dryer Vent Kit, and vinyl duct kits should be skipped entirely.

TL;DR
  • ProVent Dryer Vent Kit is the best overall dryer vent kit for a standard exterior run in 2026.
  • ProMax Dryer Vent Kit suits full replacement jobs, not quick patches.
  • Indoor Dryer Vent Kit fits laundry rooms with no exterior wall access.
  • Rigid or semi-rigid metal duct meets most codes; vinyl duct kits do not.
  • Foil flexible duct works only as a short connector, never the full run.

Why this matters

A dryer that runs hot, takes two cycles to dry a load, or pushes lint back into the room usually has a bad vent setup, not a bad dryer. The kit you buy decides how much airflow resistance that run has for as long as you own the machine.

Dundas Jafine builds dryer vent kits and duct for exactly this problem, and the seven options below cover almost every install a homeowner runs into in 2026: straight exterior runs, full replacements, indoor-only setups, and the raw duct material choices behind all of them.

What makes the best dryer vent kit

  • Duct material that meets local code for the full run, not just part of it
  • Fit for the actual path: straight shot versus tight turns behind the machine
  • Hardware sized to the standard 4-inch dryer exhaust connection
  • A real answer for indoor-only setups with no exterior wall
  • Resistance to lint buildup over years of heat and moisture cycling
  • Honest limits on where flexible material is allowed and where it isn't

Dryer vent kits at a glance

# Kit Best for Standout feature Key limitation
1 ProVent Dryer Vent Kit Standard exterior installs Matched parts sized for a typical straight-through run Not built for long or heavily angled runs
2 ProMax Dryer Vent Kit Full replacement jobs Step-up option for tearing out and redoing a whole run Overkill for a simple, short swap
3 Indoor Dryer Vent Kit Laundry rooms with no exterior access Vents indoors when there's no path outside Not a substitute for outdoor venting when it's available
4 Rigid metal duct kit Code compliance and fire safety Smooth walls resist lint buildup Doesn't bend around tight corners
5 Semi-rigid aluminum duct kit Tight turns behind the dryer Holds shape but bends around obstacles Slightly more ridges than smooth rigid pipe
6 Foil flexible transition duct Short connector, not a full run Flexes into cramped closet space Not rated to replace the full exhaust run
7 Vinyl duct kit Nothing — avoid it None Prohibited under most current building codes

1. ProVent Dryer Vent Kit: best dryer vent kit for standard exterior installs

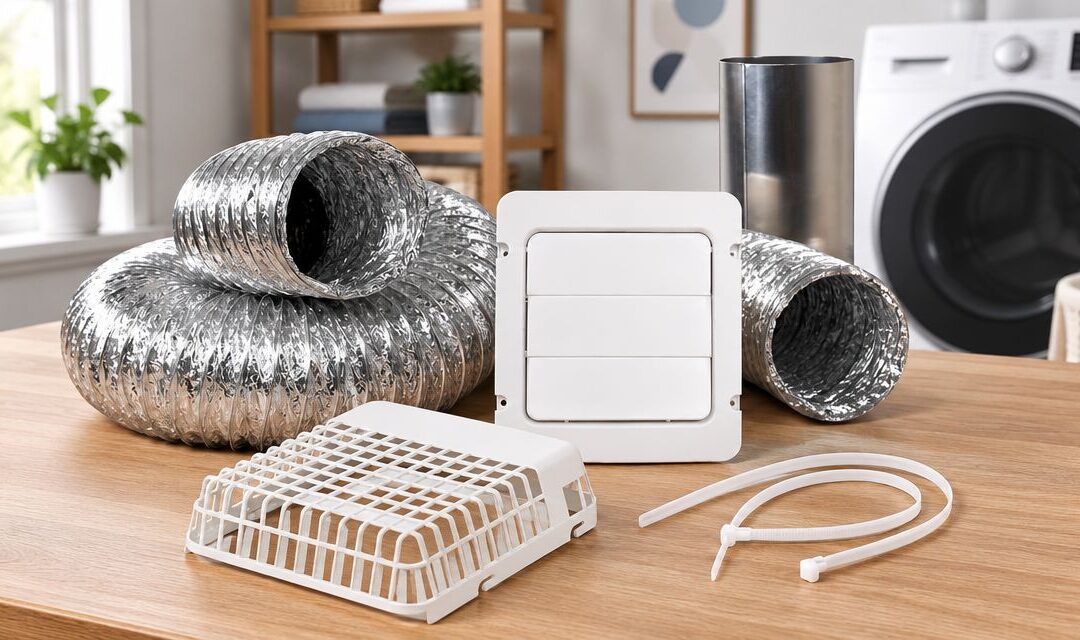
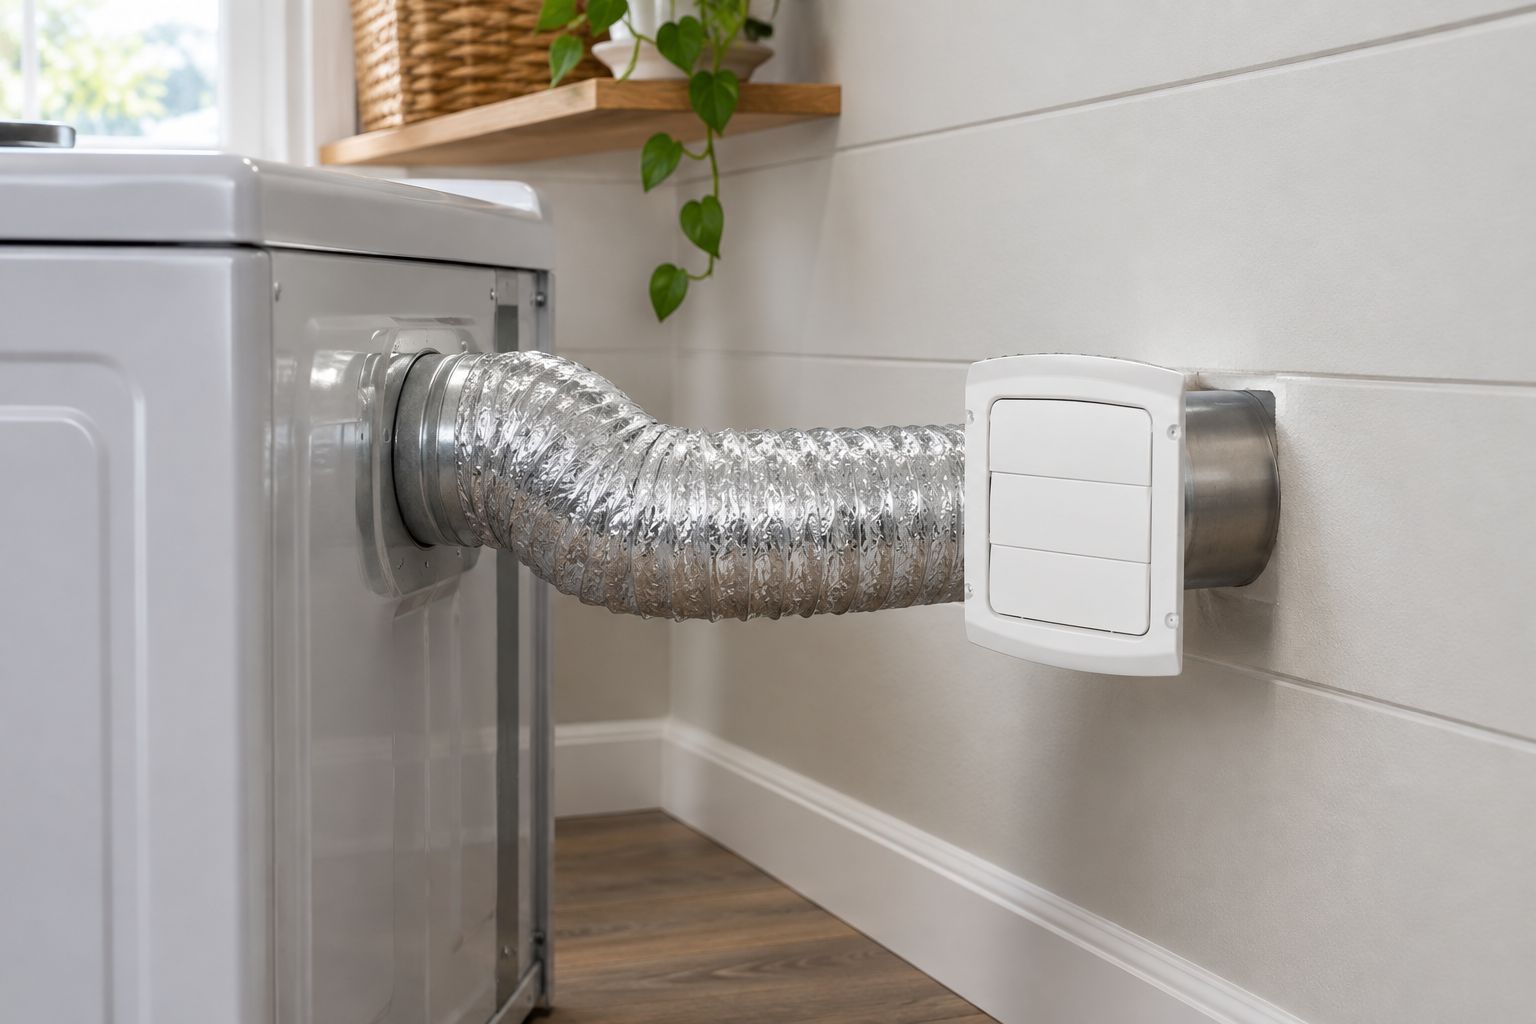
The ProVent Dryer Vent Kit is built for a dryer that vents straight out through an exterior wall. It bundles what a standard install needs into one purchase, so you're not hunting down duct, clamps and a vent hood separately.

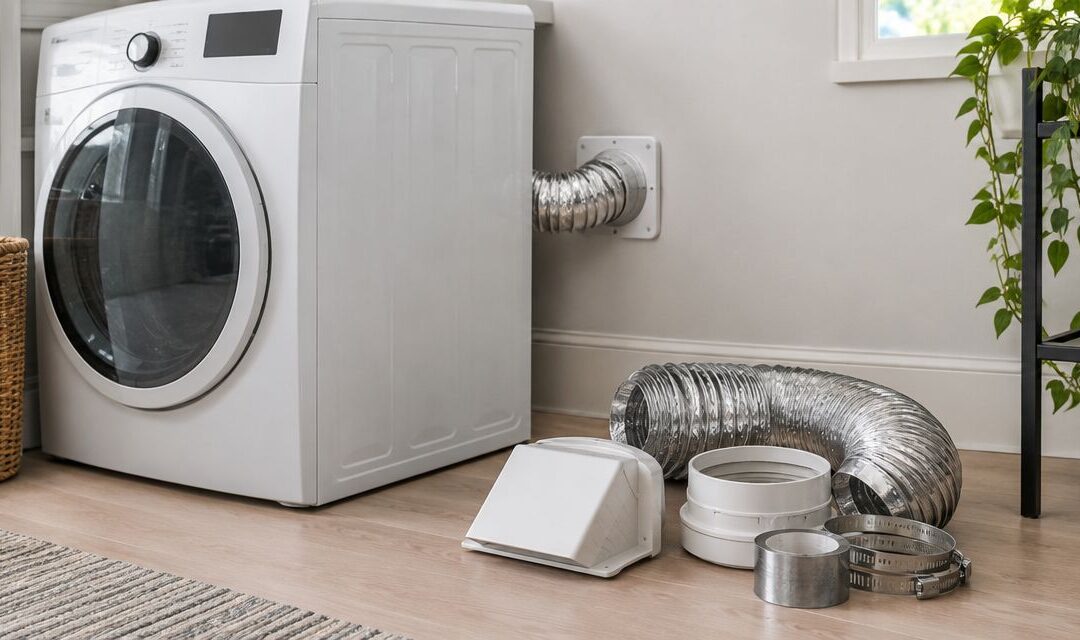
ProVent Dryer Vent Kit installed on a dryer against an exterior wall
A straight, unobstructed run to the exterior wall is what this kit is built around.

ProVent Dryer Vent Kit pros:

  • Matched, code-appropriate parts in one purchase
  • Sized for the standard 4-inch dryer exhaust connection
  • Straightforward for a first-time DIY install

ProVent Dryer Vent Kit cons:

  • Not sized for runs with several tight bends
  • No indoor-venting option if there's no exterior wall

Best for: a straight or lightly angled run to an exterior wall. Verdict: Buy.

2. ProMax Dryer Vent Kit: best dryer vent kit for full replacement jobs

The ProMax Dryer Vent Kit sits above ProVent in the lineup, built for a complete vent-system replacement rather than a quick patch. It's the one to reach for when the old run is damaged enough that you're starting over.

ProMax Dryer Vent Kit pros:

  • Designed for a full teardown-and-replace job, not a partial fix
  • Same 4-inch connection standard as the rest of the lineup
  • One purchase covers the whole job

ProMax Dryer Vent Kit cons:

  • More kit than most homeowners need for a simple swap
  • Still limited by the same code rules on bend count and material

Best for: full vent system replacements, not spot repairs. Verdict: Buy if replacing the whole run.

3. Indoor Dryer Vent Kit: best dryer vent kit for laundry rooms with no exterior access

The Indoor Dryer Vent Kit solves a different problem: what to do when the dryer physically can't vent outside. It's built for apartments, mobile homes and interior laundry closets with no path to an exterior wall.

Indoor Dryer Vent Kit pros:

  • Only real option when outdoor venting isn't physically possible
  • Fits a laundry closet with no exterior wall penetration
  • Traps lint before it recirculates into the room

Indoor Dryer Vent Kit cons:

  • Not a substitute for outdoor venting when outdoor venting is available
  • Needs regular lint-filter cleaning to keep working

Best for: laundry setups with zero access to an exterior wall. Verdict: Buy only if outdoor venting genuinely isn't an option.

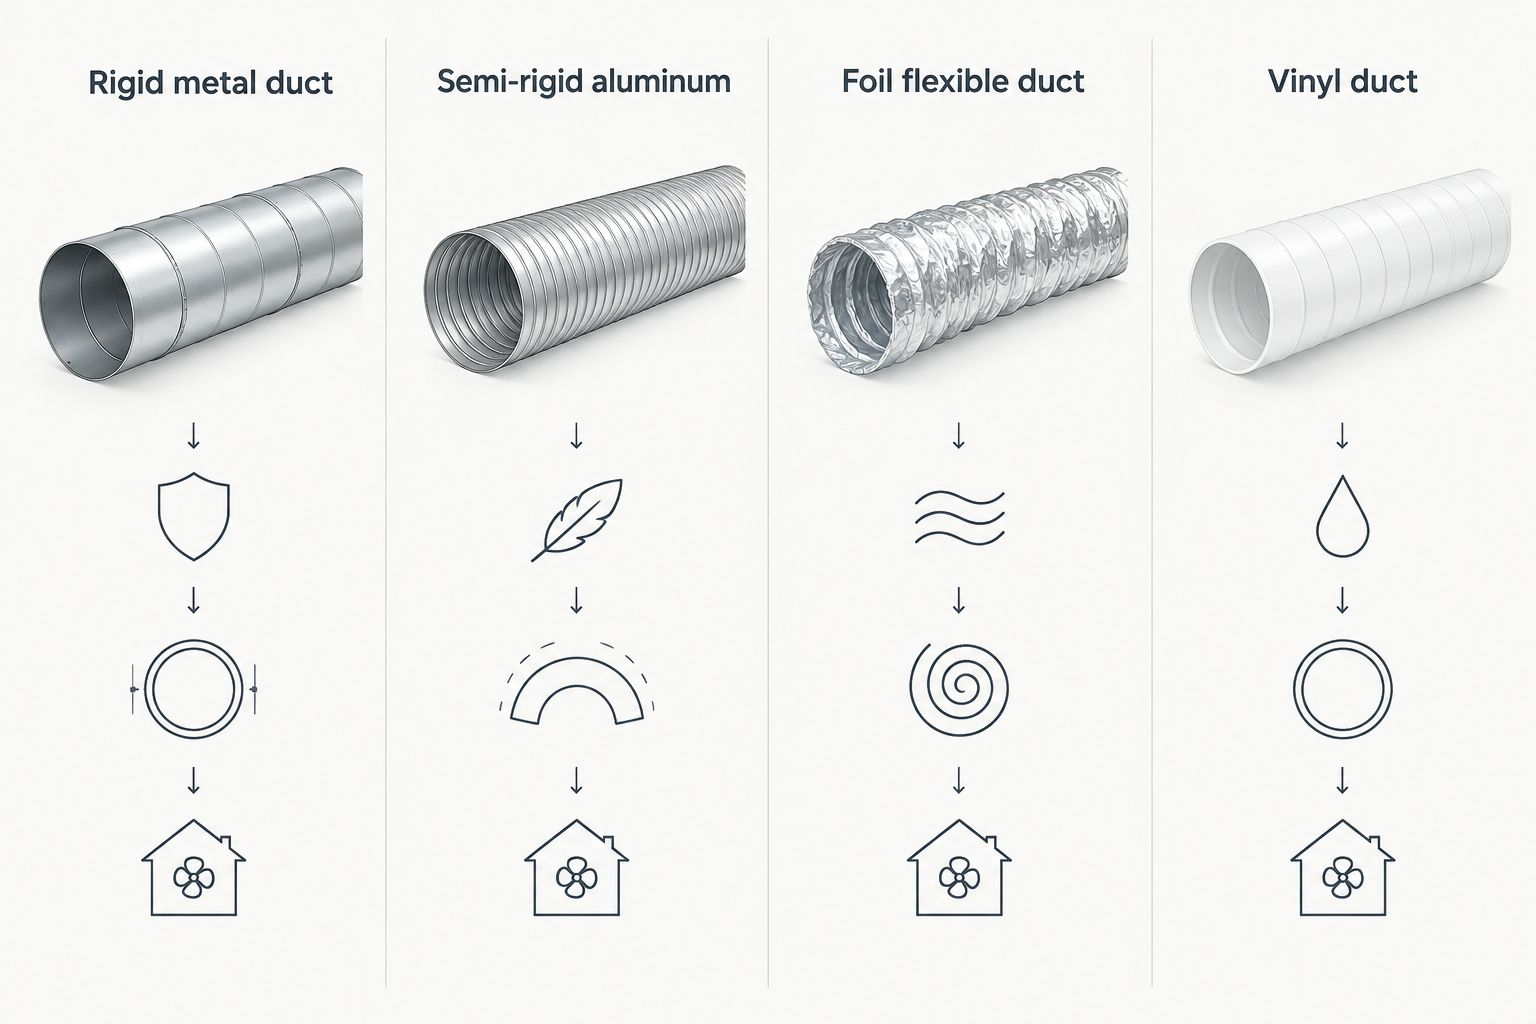
The rest of this list moves from packaged kits to the raw duct material itself, because the material decision matters as much as the kit you buy. Codes single out four categories for a dryer exhaust run, and only two of them are fully compliant for the entire length.

Four duct material types compared for dryer vent kits
Only two of these four materials meet most current codes for the full run.

4. Rigid metal duct kit: best dryer vent kit for code compliance and fire safety

Rigid metal duct is the material most building codes point to first for a dryer exhaust run. Its smooth interior walls shed lint instead of catching it, which is the main reason inspectors favor it over flexible alternatives.

Rigid metal duct pros:

  • Smooth walls resist lint buildup
  • Meets the material requirement most inspectors check for
  • Long service life with minimal maintenance

Rigid metal duct cons:

  • Doesn't flex around obstacles
  • Cutting and joining takes more work than a flexible kit

Best for: a straight, unobstructed run where code compliance matters most. Verdict: Buy for new construction or a full redo.

5. Semi-rigid aluminum duct kit: best dryer vent kit for tight turns behind the dryer

Semi-rigid aluminum duct is the compromise between rigid pipe and foil flex. It holds its shape but still bends around a corner where straight pipe won't fit, which is the usual case behind a dryer wedged into a tight closet.

Semi-rigid duct pros:

  • Bends around obstacles without collapsing
  • Still metal, so it meets most code requirements for the run
  • Easier to install solo than rigid sections

Semi-rigid duct cons:

  • Slightly more interior ridges than smooth rigid pipe
  • Can kink if bent too sharply

Best for: a run with one or two tight turns behind the machine. Verdict: Buy when rigid pipe won't fit the space.

6. Foil flexible transition duct: best dryer vent kit for a short connector, not a full run

Foil flexible duct is meant for the last short stretch between the back of the dryer and the wall or floor vent, not the whole run outside. It flexes easily into a cramped closet where nothing else fits.

Foil flex duct pros:

  • Flexes into spaces rigid and semi-rigid duct can't reach
  • Cheap and easy to swap when it gets crushed

Foil flex duct cons:

  • Not rated to replace the full exhaust run under most codes
  • Crushes easily if the dryer gets pushed back against the wall

Best for: the short connector segment only, paired with rigid or semi-rigid duct for the rest of the run. Verdict: Buy as a connector piece, never as the whole system.

7. Vinyl duct kit: best dryer vent kit for nothing — skip it

Vinyl duct kits still show up on store shelves, but this is the one category on the list with a simple answer: don't. Most current building codes, including the International Residential Code, prohibit plastic or vinyl duct for dryer exhaust because it doesn't hold up to the heat and can feed a fire instead of stopping one.

Vinyl duct pros:

  • None that outweigh the fire risk

Vinyl duct cons:

  • Prohibited under most current codes
  • Can melt or ignite under dryer exhaust heat
  • Traps more lint than smooth metal duct

Best for: nothing — replace it if you find it in your home. Verdict: Skip.

How this list was ranked

Each kit and duct type was measured against the six criteria above: code-legal material, fit for the actual path, hardware sized to a 4-inch connection, an indoor option, lint resistance, and honest limits on flexible duct. That's why the list splits into packaged kits first and raw material categories second — they answer different questions.

Which dryer vent kit should you choose in 2026?

For a standard install to an exterior wall, the ProVent Dryer Vent Kit is the default pick. Replacing an entire failing run calls for the ProMax Dryer Vent Kit, and a laundry closet with no outside wall needs the Indoor Dryer Vent Kit. Anywhere you find vinyl duct already installed, replace it before it becomes a fire risk instead of a vent.

FAQ

What is the best dryer vent kit for 2026?

The ProVent Dryer Vent Kit is the best overall dryer vent kit for 2026 for a standard exterior run. Full replacements suit the ProMax Dryer Vent Kit, and closets with no exterior wall need the Indoor Dryer Vent Kit.

Is vinyl dryer duct safe to use?

No, vinyl dryer duct is prohibited under most current building codes because it can’t handle dryer exhaust heat safely. Replace any vinyl duct you find with rigid or semi-rigid metal duct.

Can I use flexible foil duct for the entire dryer vent run?

No, foil flexible duct is meant for a short connector segment only, not the full exhaust run. Pair it with rigid or semi-rigid metal duct for the rest of the path.

What’s the difference between a dryer vent kit and buying duct separately?

A dryer vent kit bundles matched, correctly sized parts for one install so nothing is mismatched. Buying duct, clamps and a vent hood separately risks size or material mismatches.

Do I need an indoor dryer vent kit if I don’t have an exterior wall?

Yes, an indoor dryer vent kit is the practical option when there’s genuinely no path to vent outside. It’s common in apartments, mobile homes and interior laundry closets.

How much does a dryer vent kit cost?

Cost varies by material and retailer, since rigid, semi-rigid and packaged kits are priced differently. Check the retailer’s current price for exact figures.

How many bends should a dryer vent duct have?

Fewer bends is always better, since every elbow adds airflow resistance the dryer has to push against. A straight run with no elbows performs best.

Is rigid or semi-rigid duct better for a dryer vent kit?

Rigid duct wins on a straight, unobstructed run because its smooth walls resist lint buildup best. Semi-rigid aluminum wins when the path has tight turns rigid pipe can’t make.

One last thing

Duct length gets blamed for weak airflow more than it deserves. Every 90-degree elbow in a run adds more resistance than a few extra feet of straight duct, which is why a shorter run with three tight turns can dry slower than a longer, straighter one — count the bends before you count the feet.

Indoor Dryer Vent Kit: Best Picks for 2026

Indoor Dryer Vent Kit: Best Picks for 2026

Best overall for 2026: the ProFlex Indoor Dryer Vent Kit from Dundas Jafine, built for electric dryers with no exterior wall access. Best for tight laundry closets: a low-profile indoor vent kit with a slim lint-trap box. Best for basement laundry rooms set back from a wall outlet: an extended-hose indoor vent kit. Best for households running multiple loads a day: a multi-filter indoor vent kit that holds more lint between cleanings.

TL;DR
  • The ProFlex Indoor Dryer Vent Kit from Dundas Jafine wins overall for electric dryers without outdoor vent access in 2026.
  • An indoor dryer vent kit only works with electric dryers – gas dryers must vent outdoors under Canadian and US codes.
  • Low-profile kits fit stacked laundry closets; extended-hose kits suit basements set back from a wall outlet.
  • Every indoor vent kit needs its lint trap or water basin cleaned after every load, not once a month.
  • Dundas Jafine has built venting products for over 90 years, with wide retail distribution across Canada and the US.

Why this matters

An indoor dryer vent kit exists for one reason: some laundry rooms have no path to the outdoors. Basement suites, mid-building condo units, and older homes without a dedicated exterior wall near the dryer all run into the same problem – the dryer needs somewhere to push hot, lint-loaded air, and outside isn't an option.

An indoor vent kit solves that by routing exhaust air through a lint-catching box or water basin instead of a wall or roof vent. The dryer still runs hot and moves air; the kit just traps the lint indoors rather than sending it outside. It is not interchangeable with standard outdoor venting, and it is not a workaround for a gas dryer.

For a wider side-by-side across more dryer venting styles – not just indoor kits – see Dundas Jafine's best dryer vent kits comparison. This page narrows the focus to indoor kits specifically, since that's a distinct buying decision with its own rules.

Before buying anything, check the local building department. Some municipalities restrict or prohibit indoor dryer venting outright, and both Canadian and US codes are firm that gas dryers must vent to the outdoors – never into a room. Electric dryers are the only candidate for an indoor vent kit in 2026, full stop.

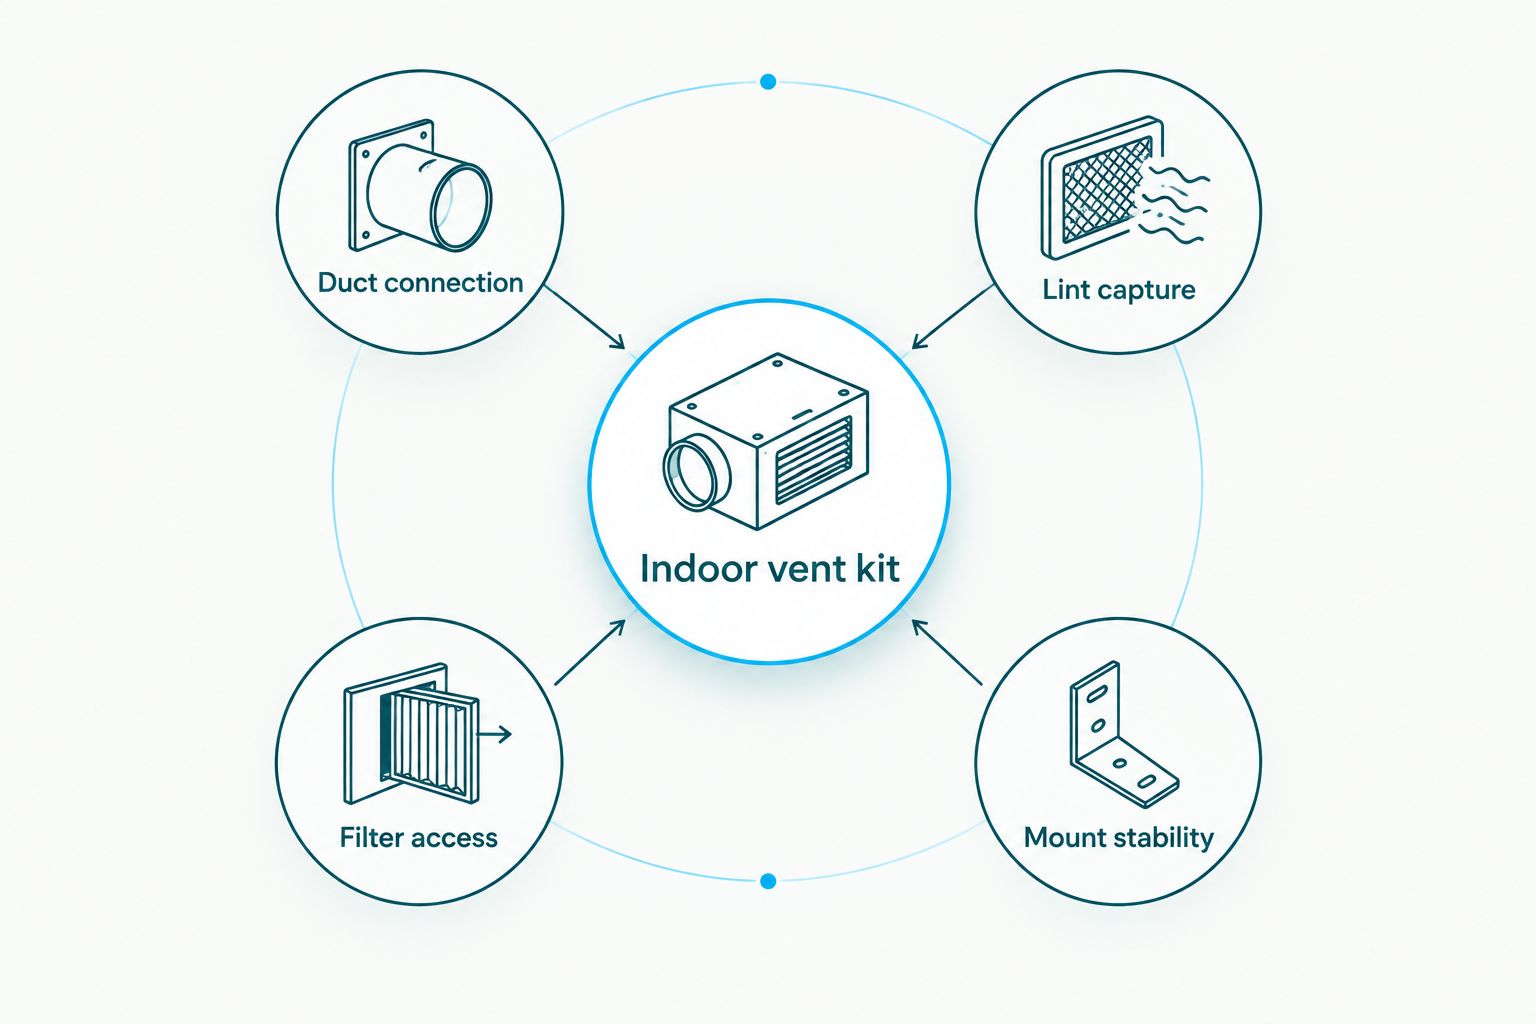
What makes the best indoor dryer vent kit

  • Dryer compatibility – electric only; a gas dryer cannot legally or safely use an indoor kit
  • Duct connection size – matches the standard 4-inch dryer duct most machines already use
  • Lint capture design – a trap box or water basin that actually holds lint instead of letting it recirculate
  • Cleaning access – a filter screen or basin you can reach and empty without tools
  • Mount stability – a bracket or footprint that holds the unit in place behind or beside the dryer
  • Code compliance – acceptable under the local jurisdiction's building code, which varies by province and state
Diagram showing the four core parts of an indoor dryer vent kit
The parts that decide how well an indoor vent kit performs are the same across brands.

Indoor dryer vent kits at a glance

Kit type Best for Standout feature Key limitation
ProFlex Indoor Dryer Vent Kit Apartments and condos with no exterior vent access Backed by Dundas Jafine's 90+ years in venting manufacturing Manual cleaning after each load, electric dryers only
Low-profile indoor vent kit Tight laundry closets and stacked units Slim trap box fits between machine and wall Smaller lint capacity means more frequent cleaning
Extended-hose indoor vent kit Basement laundry rooms set back from an outlet Longer hose reaches farther without a booster fan Longer hose runs lose some airflow efficiency
Multi-filter indoor vent kit Households running frequent daily loads Layered filter design holds more lint between cleanings Bulkier footprint, filters need periodic replacement

1. ProFlex Indoor Dryer Vent Kit: best indoor dryer vent kit for apartments and condos without exterior access

The ProFlex Indoor Dryer Vent Kit is Dundas Jafine's entry in this category, designed to connect to the standard duct size most electric dryers already run and recirculate exhaust air through a lint-catching box instead of a wall vent. It's built for the exact scenario this whole product category exists for: a laundry area with no outdoor wall or roof penetration nearby.

Dundas Jafine has manufactured air distribution and venting products for homeowners and building product retailers across North America for more than 90 years, and this kit sits alongside the company's broader dryer venting and ducting line.

ProFlex Indoor Dryer Vent Kit pros:

  • Connects to standard dryer duct sizing, no custom fitting required
  • Backed by Dundas Jafine's long manufacturing history in venting products
  • Available through building product retailers across Canada and the US
  • No exterior wall penetration needed at install

ProFlex Indoor Dryer Vent Kit cons:

  • Works only with electric dryers, never gas
  • Requires manual cleaning after every load, not on a monthly schedule
  • Some municipalities restrict indoor dryer venting – confirm locally before buying
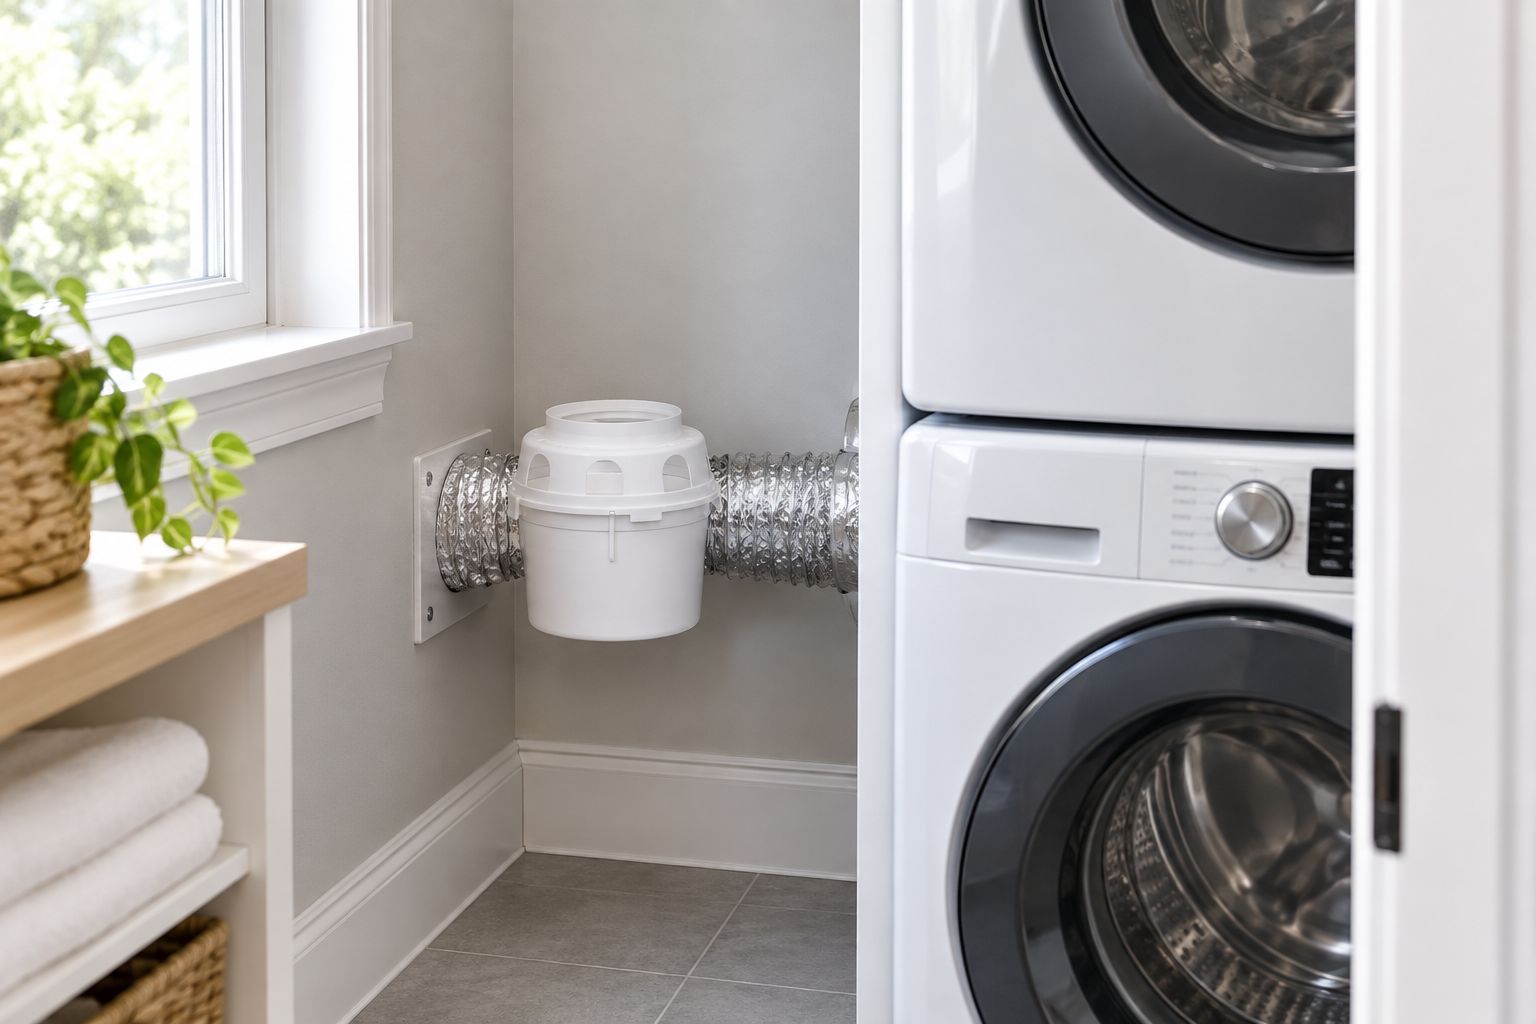
ProFlex Indoor Dryer Vent Kit installed behind a stacked laundry unit
Indoor vent kits mount low and out of the way, behind or beside the dryer.

Verdict: Buy if you have an electric dryer and no path to outdoor venting – this is the category's default pick for 2026.

2. Low-profile indoor vent kit: best indoor dryer vent kit for tight laundry closets

A low-profile kit trades lint capacity for footprint. The trap box sits flush against the wall or between the dryer and the closet frame, which matters when a stacked washer-dryer unit leaves almost no clearance behind the machine.

Low-profile indoor vent kit pros:

  • Fits stacked units and narrow closets where a standard box won't clear
  • Keeps the duct run short, which helps airflow

Low-profile indoor vent kit cons:

  • Smaller trap means more frequent cleaning cycles
  • Less forgiving if lint output runs high on heavy loads

Verdict: Buy if closet clearance, not lint volume, is the deciding constraint.

3. Extended-hose indoor vent kit: best indoor dryer vent kit for basement laundry rooms

Basement laundry setups often place the dryer several feet from the nearest wall outlet or floor drain, farther than a standard kit's hose reaches comfortably. An extended-hose version adds length without forcing a tight bend that chokes airflow.

Extended-hose indoor vent kit pros:

  • Reaches a farther wall point without a booster fan
  • Keeps the trap box positioned away from foot traffic

Extended-hose indoor vent kit cons:

  • Longer hose runs cost some airflow efficiency versus a short connection
  • Needs periodic inspection along the full hose length for lint buildup

Verdict: Buy if your basement dryer sits well back from the nearest wall connection point.

4. Multi-filter indoor vent kit: best indoor dryer vent kit for high-load households

Households doing several loads a day generate more lint per week than a single-filter box comfortably holds. A multi-filter or layered-filter kit spreads that load across two catch points instead of one.

Multi-filter indoor vent kit pros:

  • Holds more lint between cleanings, useful for large families
  • Reduces the odds of a missed cleaning cycle causing overflow

Multi-filter indoor vent kit cons:

  • Larger footprint than a single-filter design
  • Replacement filters add a recurring task to the maintenance list

Verdict: Buy if your laundry room runs multiple loads daily and a single trap fills too fast.

How this list was ranked

Each entry was weighed against the same six criteria from the section above: dryer compatibility, duct sizing, lint capture design, cleaning access, mount stability, and code compliance. The ranking is a decision tree by use case, not a leaderboard – the ProFlex Indoor Dryer Vent Kit and the three configuration types below it each solve a different laundry room constraint rather than competing for the same slot.

Which indoor dryer vent kit should you choose?

Most readers land on the same answer: if your electric dryer has no outdoor vent path, the ProFlex Indoor Dryer Vent Kit from Dundas Jafine is the default choice for 2026, backed by a manufacturer with over 90 years in air distribution and venting products. If closet space, hose reach, or lint volume is the real constraint, match to the low-profile, extended-hose, or multi-filter configuration above instead. Whichever you pick, confirm your local code allows indoor dryer venting before you buy, and never install one on a gas dryer.

FAQ

What is an indoor dryer vent kit?

An indoor dryer vent kit routes dryer exhaust air through a lint-catching box or water basin inside the home instead of venting it outdoors. It’s used where there’s no exterior wall or roof access near the dryer.

Is an indoor dryer vent kit safe?

It’s safe for electric dryers when installed and maintained correctly, including regular cleaning of the trap or basin. It is never safe or code-compliant for gas dryers, which must vent outdoors.

Can I use an indoor dryer vent kit with a gas dryer?

No. Gas dryers must vent to the outdoors under both Canadian and US building codes because of combustion byproducts. Indoor vent kits are built for electric dryers only.

How often do I need to clean an indoor dryer vent kit?

Clean the lint trap or water basin after every load, not on a weekly or monthly schedule. Skipping cleanings reduces airflow and can cause overflow.

Does Dundas Jafine make an indoor dryer vent kit?

Yes, the ProFlex Indoor Dryer Vent Kit is Dundas Jafine’s indoor venting product, built for electric dryers without outdoor vent access. It’s part of the company’s broader dryer venting and ducting line.

What duct size does an indoor dryer vent kit need?

Most indoor dryer vent kits connect to a standard 4-inch dryer duct, matching what most electric dryers already use. Confirm your dryer’s exhaust port size before buying.

Are indoor dryer vent kits legal in Canada and the US?

Legality depends on the local building department, since some municipalities restrict or prohibit indoor dryer venting. Check local code requirements before installing one in 2026.

How long does an indoor dryer vent kit last?

Lifespan depends on maintenance more than the kit itself – a trap or basin cleaned after every load will outlast one that’s neglected. Check the housing periodically for cracks or wear regardless of age.

One last thing

Many municipalities require a building department sign-off before an indoor dryer vent kit passes inspection – check with the local authority before you buy, not after installation. A kit that works perfectly on the bench can still fail an inspection if indoor venting isn't permitted in your zoning.

Related guides