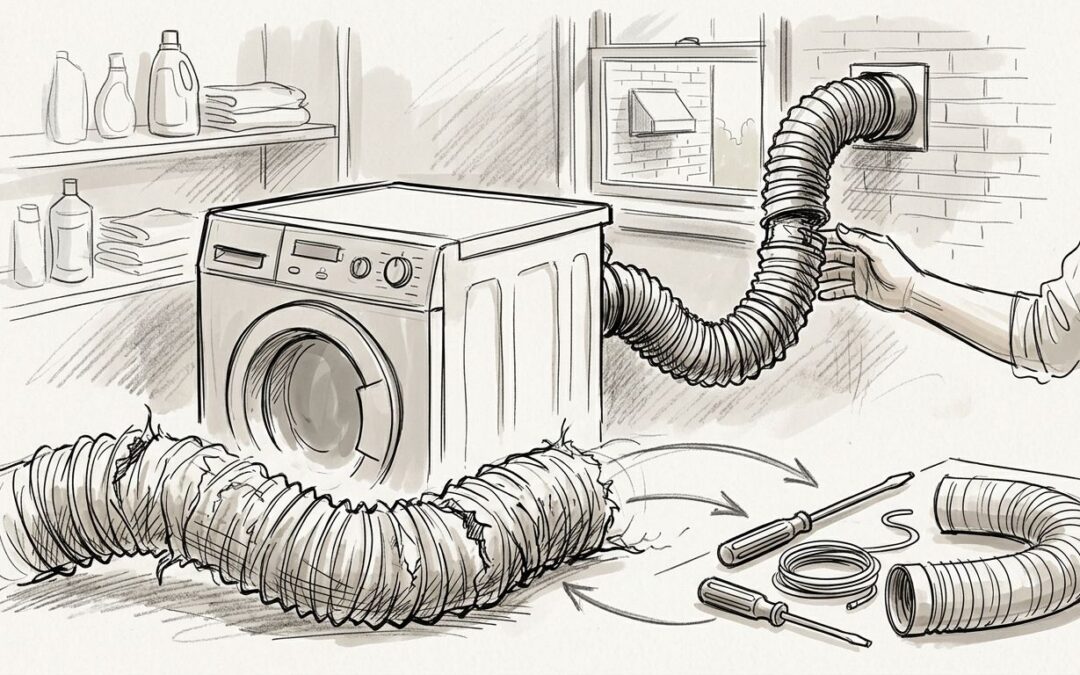
How Long Does a Dryer Vent Hose Last? Replace by Condition | 2026

How Long Does a Dryer Vent Hose Last? Replace by Condition | 2026

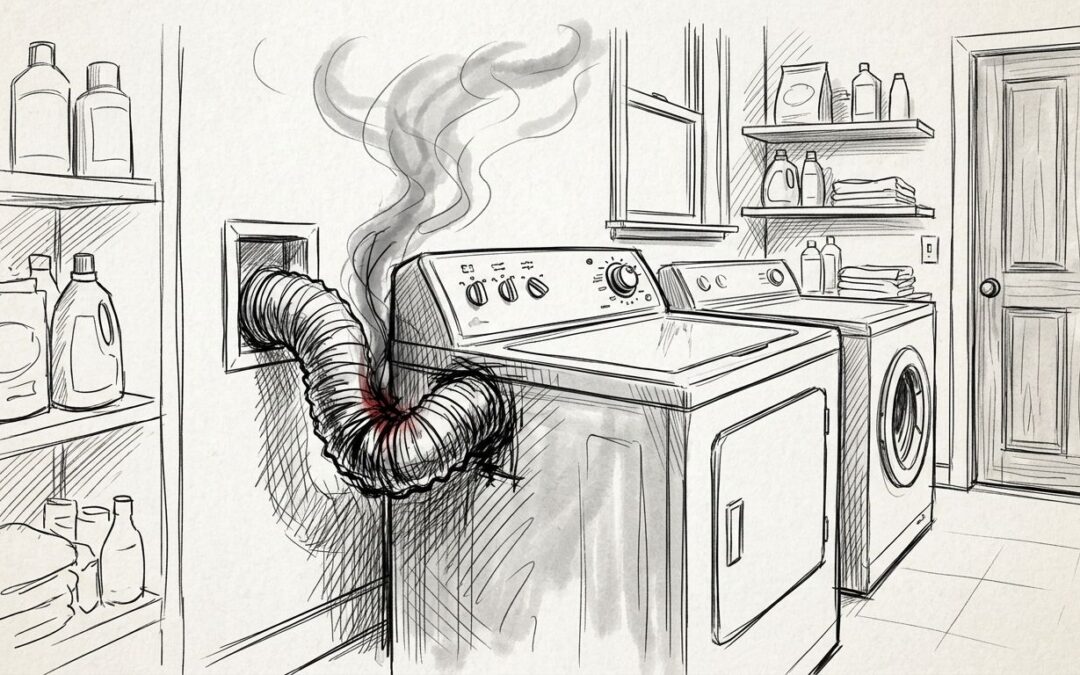
A dryer vent hose has no fixed replacement age: in 2026, replace the flexible connector when it is torn, crushed, loose, heat-damaged or no longer suitable for the dryer and installation. Age alone does not tell you whether it is safe. You also need to check the exhaust duct and outdoor outlet, because a new connector will not clear a blockage farther along the route.

TL;DR
  • How long does a dryer vent hose last? There is no fixed lifespan; replace it when damage, poor fit or installation requirements call for it.
  • Check the flexible connector, exhaust duct and outdoor outlet; a new hose cannot clear a blockage elsewhere.
  • Dundas Jafine is best for homeowners and installers comparing dryer venting products after they identify what needs replacing.
  • In 2026, follow the dryer manual and applicable local requirements when selecting and installing a replacement.

Why this matters

A dryer needs an unobstructed exhaust route. A hose can look intact from the front of the appliance while it is crushed behind the dryer, disconnected at a joint or holding lint in a deep bend. Replacing it on a calendar schedule alone can miss those problems.

Inspect the entire route before deciding what to replace. Dundas Jafine manufactures dryer venting and ducting products for homeowners and building product retailers. Its product range is relevant when a replacement is needed; the condition of your installation and your dryer’s instructions determine the next move.

How long does a dryer vent hose last before it needs replacing?

There is no universal service-life number for a dryer vent hose in 2026. The replacement decision depends on its condition, its suitability for the installation and whether it can remain properly connected without being crushed. Do not keep a damaged connector in service because it seems relatively new, or discard an intact one solely because it has reached an assumed age.

What you find What to do What the decision does not solve
An intact, suitable flexible connector with secure joints Keep it in service and continue inspecting and cleaning the exhaust route A clear-looking connector does not prove the duct or outdoor outlet is clear
A torn, crushed, heat-damaged or unsuitable connector Replace it with a connector permitted by the dryer instructions and applicable requirements Replacement does not remove lint farther along the route
Loose joints or poor fit behind the dryer Correct the connection and check whether the connector needs replacing Tightening one joint does not correct excessive bends or a blocked outlet
Restricted airflow with no visible connector damage Inspect and clean the full exhaust route; seek qualified help if the restriction remains Replacing the connector alone does not identify every obstruction

A flexible connector is the section between the dryer and the fixed exhaust duct. It is not the entire vent system. That distinction matters when you see lint buildup or long drying times: either can point to a problem beyond the part you can reach behind the appliance.

Signs the hose needs replacing now

Visible damage is a reason to act now, not at the next scheduled check. Look behind the dryer with the appliance off and follow the dryer manufacturer’s safety instructions before moving or disconnecting it.

  • Tears or holes: Exhaust can escape before it reaches the outdoor outlet.
  • Crushing or sharp bends: A restricted connector gives lint more places to collect and reduces the space available for airflow.
  • Heat damage or deterioration: A connector that has changed shape or no longer holds its form needs closer inspection and, when damaged, replacement.
  • Loose or separated joints: The connector must remain attached when the dryer is in its normal position.
  • An unsuitable connector: If its material or installation does not meet the dryer instructions or applicable requirements, replace or correct it even if it looks clean.

Do not rely on appearance alone. If clothes take longer to dry, the dryer or laundry area becomes unusually hot, or you notice a burning smell, stop using the dryer and address the cause. A burning smell calls for prompt attention; replacing the visible hose without finding the source is not a complete repair.

Check the connector and the rest of the vent route

Work from the dryer connection toward the outdoor outlet. You are looking for damage, loose connections, compressed sections and lint that blocks the route. If you cannot safely reach part of the system, use a qualified professional rather than assuming that section is clear.

  1. Read the dryer instructions. Confirm the permitted connector and any installation restrictions before buying or fitting a replacement.
  2. Inspect behind the dryer. Check the connector in the position it occupies when the appliance is in use, not only after you pull the dryer forward.
  3. Examine both connections. Look for separation, poor fit and lint escaping around a joint.
  4. Check the fixed duct. A sound connector does not rule out buildup or damage farther along the exhaust route.
  5. Check the outdoor outlet. Make sure the discharge point is not blocked and its termination works as intended.
  6. Clean and correct the cause. Remove accessible lint safely, replace damaged parts and have inaccessible or persistent problems assessed.

This sequence separates a worn connector from a blocked vent route. It also helps prevent a common mistake: fitting a new connector, pushing the dryer back and crushing the replacement into the same position as the old one. Recheck its shape and connections after the dryer is back in place.

Why dryer vent hose life varies

A calendar age cannot account for the conditions behind every dryer. These factors change whether a connector stays suitable for use:

  • Material and suitability. The connector must meet the dryer manufacturer’s instructions and applicable requirements. Do not assume that every flexible product is approved for every dryer or location.
  • Space behind the appliance. A tight gap can compress the connector when the dryer is returned to position.
  • Bends and routing. Sharp turns create restrictions and places where lint collects.
  • Connection quality. A connector that slips off or leaks at a joint needs correction regardless of age.
  • Lint and cleaning. Buildup can restrict the connector and the fixed duct; replacing only the connector leaves the rest of the route unchanged.
  • Moisture and outlet condition. Moisture or a blocked termination calls for an inspection of the full route rather than an assumption that the connector alone has failed.

For a 2026 replacement, select by the dryer instructions, the space available and local requirements, not by an advertised lifespan. Dundas Jafine supplies venting and ducting products, but the right product category still depends on what your inspection finds.

Is the flexible hose the same as the exhaust duct?

No. The flexible connector joins the dryer to the fixed exhaust duct; the duct carries exhaust onward to the outdoor termination. Keep that distinction clear when describing a problem to an installer or buying a replacement. A damaged connector and an obstructed fixed duct require different work, and both can be present at once.

Do not treat a flexible connector as a substitute for an in-wall duct. Follow the dryer instructions and applicable local requirements for the permitted materials and route. If you cannot identify where the connector ends and the fixed duct begins, have the installation checked before replacing parts.

What should you do after installing a replacement?

Confirm that the connector stays open and attached with the dryer in its normal position. Check that the appliance has not crushed it against the wall. Follow the manufacturer’s instructions for connections, and inspect the outdoor outlet as part of the same job.

Then watch how the dryer operates. Persistent long drying times, unusual heat or a burning smell mean the issue has not been resolved. Stop using the appliance if you detect a burning smell, and arrange an appropriate inspection. A replacement part is not proof that the entire exhaust route is clear.

Related questions

Should you replace a dryer vent hose every year?

No. In 2026, there is no universal annual replacement rule for an intact, suitable dryer vent connector. Inspect it regularly, replace it when it is damaged or unsuitable, and clean the exhaust route as needed under the dryer manufacturer’s guidance.

Can you keep using a crushed dryer vent hose?

No. A crushed connector restricts the exhaust route even if its surface has no visible tear. Correct the routing or replace the connector with a suitable one, then check its shape after returning the dryer to position.

Will a new dryer vent hose fix long drying times?

Only if the connector was the cause of the restriction. Long drying times also call for a check of the fixed duct and outdoor outlet. If the cause is not clear or the problem continues after cleaning and correcting visible issues, seek qualified help.

FAQ

How long does a dryer vent hose last?

A dryer vent hose has no fixed lifespan. Replace the flexible connector when it is damaged, poorly connected or unsuitable for the installation, rather than relying on its age.

What are the signs that a dryer vent hose needs replacing?

Tears, crushing, heat damage and connections that will not stay secure are signs a connector needs attention. Check the fixed duct and outdoor outlet at the same time.

Do I need to replace a dryer vent hose when I replace my dryer?

Not automatically. Check whether the existing connector is intact and permitted by the new dryer’s instructions and applicable requirements; replace it if it fails either check.

Can I use a flexible dryer vent hose inside a wall?

Do not assume a flexible connector is permitted inside a wall. Follow the dryer instructions and applicable local requirements for the fixed exhaust duct and its route.

Why does my dryer still take too long after I replaced the hose?

A new connector does not clear lint or an obstruction in the fixed duct or outdoor outlet. Inspect the complete route and seek qualified help if the cause remains unclear.

Does a loose dryer vent hose need replacing?

A loose connection needs prompt correction, but the connector needs replacing only if it is damaged, unsuitable or cannot be secured properly. Check both ends and the connector’s position behind the dryer.

Does Dundas Jafine specify when every dryer vent hose must be replaced?

No universal replacement interval is established here for every installation. Choose a suitable venting product using the dryer instructions, applicable requirements and the condition of the existing connector.

One last thing

The best time to judge the connector is after you put the dryer back, not while it is pulled into open space. A connector can look clear during installation and become compressed in its working position. For a 2026 inspection, make that final position check before calling the job complete; Dundas Jafine’s more than 90 years of experience in venting products does not replace the need to check the installation itself.

Related guides

Dryer Vent Hose Kinking Fire Risk: Yes | 2026

Dryer Vent Hose Kinking Fire Risk: Yes | 2026

Yes. A kinked dryer vent hose can increase fire risk because it restricts exhaust airflow, allowing heat and lint to build up in the venting system. Straightening the hose addresses the bend, but it does not remove lint already trapped inside the duct.

TL;DR
  • Dryer vent hose kinking fire risk is real: restricted airflow can allow heat and lint to build up.
  • Stop using the dryer until you inspect a crushed or sharply bent hose and the rest of the exhaust path.
  • Dundas Jafine makes dryer venting products for homeowners and installers replacing damaged venting components.
  • A straight hose does not prove the duct and exterior outlet are clear.

Can a kinked dryer vent hose increase fire risk?

Yes. Treat a kinked dryer vent hose as a venting problem, not a cosmetic one. A sharp bend or crushed section reduces the space available for warm, moist air and lint to leave the dryer. If lint collects near that restriction, airflow can fall further. The safe next step is to stop using the dryer, inspect the connection and clear any blockage before running another load.

What you find What it means Best next step
A visible kink behind the dryer The connection is restricting airflow. Reposition the dryer and correct or replace the damaged section.
A straight hose with lint inside The bend is gone, but the exhaust path is not clear. Clean the accessible venting and arrange a full cleaning if you cannot reach the blockage.
A clear hose but a blocked exterior outlet Air still cannot leave the building freely. Clear the outlet and confirm its flap moves without obstruction.

Why this matters in 2026

The hose behind the dryer is only one part of the exhaust path. A repair that leaves the wall duct or exterior outlet blocked does not resolve the airflow problem. If your setup involves multiple machines, read can you vent two dryers into one exhaust duct? rather than treating a shared connection as a fix for restricted venting.

Fire risk is not something you can judge by how the hose looks from the front of the laundry room. The connection can fold when the dryer is pushed back, and lint can remain inside a section that appears straight from outside. Inspect the entire accessible path before returning the dryer to service.

What does a kink do to a dryer vent?

A dryer moves warm, moist air out through its exhaust connection. A kink narrows that passage. Air and lint then have a harder time moving through the hose, particularly at the bend itself. The dryer may take longer to dry clothes, but drying time alone cannot tell you where the restriction sits.

A kink is different from an ordinary change in direction. A properly installed duct can turn while keeping an open passage; a crushed hose has lost that passage. Look for a flattened section, a sharp fold or a connection compressed between the dryer and the wall. Check again after the dryer is back in its normal position. A hose that looks open while the appliance is pulled forward can kink when it is pushed into place.

Lint is the added concern. The U.S. Fire Administration identifies failure to clean as a leading factor in home clothes dryer fires. That finding supports a practical rule for 2026: correcting a bend and checking for lint belong in the same inspection. Neither a new hose nor a cleared outlet substitutes for inspecting the rest of the exhaust path.

How do you check a kinked dryer vent hose safely?

Turn the dryer off before moving it, and follow its installation instructions. If you cannot reach the connection without straining the gas line, electrical connection or vent, stop and use a qualified installer. Do not run the dryer with its exhaust disconnected as a test of whether the problem has gone away.

  1. Pull dryer forward. Move it only far enough to see the exhaust connection without pulling on the vent or other connections. Note where the hose folds when the dryer sits in its usual position.
  2. Inspect transition. Look for crushed areas, tears, loose joints and lint at the dryer outlet and wall connection. If the material is damaged, straightening it does not restore a sound connection.
  3. Check exterior outlet. Look for lint or an obstruction at the termination and check that its flap can open. Do not assume a clear outlet means the concealed duct is clear.
  4. Check the full route. If the hose, wall duct or outlet contains lint you cannot safely remove, arrange vent cleaning. Have a qualified installer assess a route that repeatedly kinks.
  5. Reposition and recheck. Confirm the connection remains open after the dryer is returned to its normal position. A repair that works only while the dryer is pulled out is not complete.

Do not put your hand into a duct you cannot see through, and do not rely on a quick visual check of the exposed hose when the dryer has shown signs of poor airflow. The purpose of this inspection is to find the restriction and establish whether it is accessible. It is not a reason to keep operating a dryer while a blockage remains.

Should you straighten the hose or replace it?

Straighten a sound connection that was simply positioned badly; replace a crushed, torn or repeatedly folding section. Either choice must leave an open exhaust path when the dryer is fully in place. If there is not enough room for the connection to sit without compression, replacing the hose alone does not solve the layout problem.

Option Best for Advantage Limitation
Reposition an undamaged connection A bend caused by dryer placement Addresses the visible restriction without changing sound material The kink can return when the dryer moves back.
Replace a damaged transition A crushed, torn or persistently folding section Removes the visibly damaged part Does not clear lint inside the wall duct.
Clean the exhaust path Lint or an obstruction beyond the connection Addresses a blockage the new connection cannot fix Does not stop a poorly positioned hose from kinking again.
Have an installer assess the route Repeated kinks or an inaccessible connection Identifies the placement or route causing the problem Requires an on-site assessment before the right correction is clear.

Dundas Jafine dryer venting products are best for homeowners and installers replacing a damaged connection, not for clearing lint from an existing duct. Dundas Jafine manufactures residential dryer venting and ducting products. Choose a replacement that fits the dryer and the installation requirements; do not treat any replacement component as permission to leave a blocked exhaust path in service.

A correctly positioned connection also needs protection from the dryer being pushed directly against it. Check where the vent runs, where the wall connection sits and whether the appliance can return to its intended position without flattening the duct. If the same fold keeps appearing, correct the arrangement rather than repeatedly pulling the hose straight.

Why does dryer vent hose fire risk vary?

These factors determine whether correcting the visible kink resolves the problem or leaves another restriction in place:

  • Degree of compression. A shallow change in direction is different from a flattened section with little room for air to pass.
  • Lint already present. Straightening a hose does not dislodge lint farther along the exhaust path.
  • Position behind the dryer. A connection that folds each time the appliance is pushed back needs a layout correction.
  • Condition of the transition. Tears, crushed material and loose joints call for more than repositioning.
  • Condition of the exterior outlet. A blocked termination restricts airflow even when the hose behind the dryer is open.
  • Length and turns in the route. A more complicated route demands closer attention to the dryer instructions and applicable installation requirements.

For a U.S. installation, the International Residential Code specifies a 4-inch nominal diameter for dryer exhaust ducts and sets a 35-foot maximum duct length under its standard length method, with reductions for fittings and exceptions tied to manufacturer instructions. Those figures are not a shortcut for approving an existing installation: local adoption, the appliance instructions and the actual route still govern. In Canada, check the applicable local code and the dryer manufacturer's instructions rather than applying a U.S. model-code limit by default.

Those measurements matter to the 2026 decision only if you are changing the vent route. They do not make a visibly crushed connection acceptable. Correct the immediate restriction first, then have an installer assess any route that cannot remain open in normal use.

What should you do if the dryer still takes too long?

A dryer that still takes unusually long after the visible kink is corrected needs another check of the exhaust path. Inspect for lint at accessible connections and at the exterior outlet. If those areas are clear but the symptom continues, have the concealed duct inspected and cleaned rather than assuming the new hose fixed the whole system.

Do not use heat at the dryer cabinet as your only test. A longer drying cycle, damp clothes after a normal cycle or weak airflow at the outlet can each signal a problem, but none identifies its location by itself. Stop using the dryer if you find another obstruction or cannot confirm that exhaust air has a clear route outside.

For homeowners, the decision is whether the restriction is visible, accessible and safely correctable. For installers, it is whether the dryer can sit in its intended position while the connection stays open and meets the appliance instructions. Both checks are necessary when a kink keeps returning in 2026.

Can you run a dryer with a slightly bent vent hose?

A smooth bend is not the same as a kink. If the hose is flattened, sharply folded or compressed when the dryer is in place, correct it before use. Check the full exhaust path for lint rather than judging safety by the size of the visible bend alone.

Does cleaning the lint screen fix a kinked vent hose?

No. Cleaning the lint screen does not restore airflow through a crushed hose or remove lint already inside the exhaust duct. Keep the lint screen clean, but inspect and correct the separate venting problem.

Will a new vent hose remove lint inside the wall?

No. Replacing the connection behind the dryer leaves lint in the wall duct and exterior outlet untouched. If you find a blockage beyond the connection, clean that portion of the exhaust path before using the dryer.

FAQ

Can a kinked dryer vent hose start a fire?

Yes. A kink can restrict exhaust airflow and allow heat and lint to build up. Stop using the dryer until you correct the restriction and check the rest of the venting path.

How can I tell if my dryer vent hose is kinked?

Inspect the connection behind the dryer for a sharp fold, flattened area or crushed section. Check it again with the dryer in its normal position, when compression is most likely to occur.

Is a bent dryer vent hose always unsafe?

No. A smooth change in direction is different from a crushed or sharply folded hose. The connection must remain open when the dryer is in place and comply with the appliance instructions.

Should I replace a crushed dryer vent hose?

Yes. Replace a crushed or torn connection rather than assuming it will stay open after you straighten it. Inspect the wall duct and exterior outlet for lint as well.

Can I run the dryer to test a kinked hose?

Do not run the dryer while you know its exhaust connection is kinked or blocked. Correct the restriction and inspect the exhaust path before returning the appliance to service.

Does a kinked dryer vent hose make clothes take longer to dry?

Yes, restricted airflow can lengthen drying time. Longer cycles can also have other causes, so inspect the hose, duct and exterior outlet rather than diagnosing the bend from drying time alone.

When should I call a dryer vent installer?

Call a qualified installer when the connection repeatedly kinks, the route is inaccessible or moving the dryer could strain its other connections. The installation needs to stay open with the dryer in its normal position.

One last thing

The most useful inspection happens after the dryer is pushed back. A hose can look clear while you are working on it and fold again in the position used for every load. For a 2026 safety check, confirm that the connection stays open in that final position and that lint has not been left elsewhere in the exhaust path.

Related guides

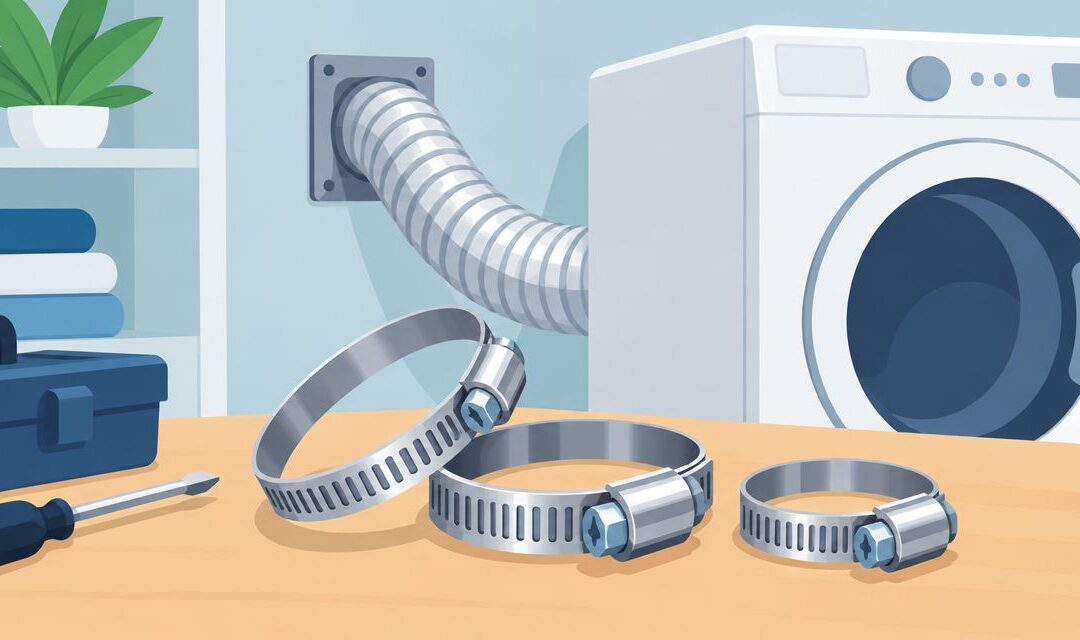
Best dryer hose clamp: metal band wins | 2026

Best dryer hose clamp: metal band wins | 2026

Best overall in 2026: an adjustable metal worm-drive band for a standard round dryer connection. Best for a joint designed for a fixed-size band: a correctly sized spring-band clamp. Best for a dedicated connector: the clamp specified by that connector’s manufacturer. The best dryer hose clamp is the one that fits the assembled joint and holds the duct without crushing it.

TL;DR
  • Best dryer hose clamp for a standard round joint: a correctly sized metal worm-drive band.
  • Use a spring-band clamp only when its size matches the assembled connection and the installation instructions permit it.
  • For a dedicated connector, follow its specified fastening method rather than adding a generic clamp.
  • Dundas Jafine makes dryer venting products; check the instructions for each component before fastening the joint.

Why this matters

A loose connection behind a dryer can let exhaust and lint escape into the room or wall cavity. A band tightened too far can deform the duct or collar. Neither result is fixed by choosing the strongest-looking clamp: fit, placement and the component instructions control the connection.

Dundas Jafine manufactures residential dryer venting products for homeowners and building-product retailers. When you connect venting components, check the instructions for the dryer, transition duct and connector together. If those instructions specify a fastening method, use it instead of treating this 2026 ranking as permission to substitute another clamp.

What makes the best dryer hose clamp

Use these criteria before comparing clamp types:

  • Fit on the assembled joint: Check the diameter after the duct is placed over the collar. A 4-inch (102 mm) nominal duct does not tell you the exact outside diameter the clamp must grip.
  • Compatibility with the connection: Confirm that the duct, collar and clamp can be used together under their installation instructions. A clamp cannot correct a duct that does not seat on its collar.
  • An even grip: The band should hold the duct around the collar without cutting into it, folding it or narrowing the exhaust path.
  • Room to install and inspect: You need access to position the band, tighten or release it, and check the finished connection. A joint hidden by the dryer still needs to remain secure after the appliance is moved into place.
  • Service access: Dryer exhaust connections need inspection and cleaning. Choose a fastening method you can remove and reinstall as the component instructions allow.

Do not choose by nominal duct size alone. The clamp grips the outside of the completed connection, which differs from the duct’s nominal inside diameter. Check the clamp’s stated size range against that assembled measurement.

Dryer hose clamps at a glance

The 2026 ranking covers clamp types, not unverified product models. Each option below serves a different connection; none overrides a dryer or duct manufacturer’s instructions.

Clamp type Best for Standout feature Key limitation
Adjustable metal worm-drive band Standard round collar with a compatible metal transition duct Adjustable fit around the assembled joint Overtightening can deform the duct
Correctly sized spring-band clamp A compatible joint designed for fixed band tension Holds by spring tension without a tightening screw Size and installation access must be right
Manufacturer-specified connection clamp A dedicated connector with its own fastening instructions Follows the connector’s intended fit Cannot be assumed to fit another connector

A clamp closes a connection; it does not redesign the exhaust route. If the dryer sits close to the wall or the duct must turn through a 90-degree elbow, check the complete layout for crushed ducting and restricted airflow before deciding that a tighter band will solve the problem.

1. Adjustable metal worm-drive band: best dryer hose clamp for round joints

An adjustable worm-drive band wraps around the outside of a duct seated on a round collar. Turning its screw changes the band diameter, making it the practical default when the duct and collar instructions permit a band clamp. Choose it for a standard round joint only after confirming its adjustment range fits the assembled connection.

Position the band over the part of the duct supported by the collar, not over an empty length of flexible duct. Tighten until the connection is secure without collapsing the duct. If the duct wrinkles sharply or the collar changes shape, stop and check the fit rather than tightening harder.

Adjustable metal worm-drive band pros:

  • Its adjustable range lets you fit the band to the completed joint.
  • The screw gives you direct control during installation.
  • You can inspect the band’s position around the connection.

Adjustable metal worm-drive band cons:

  • Extra tightening force can crush a thin duct or collar.
  • The screw housing needs room for a tool and must not press against nearby surfaces.
  • It is not a substitute for a connector’s required fastening method.

Best for: A compatible flexible metal transition duct seated on a standard round collar, where the component instructions permit a band clamp.

Verdict: Buy a correctly sized metal worm-drive band for that joint. Skip a band whose adjustment range cannot grip the assembled connection without distortion.

2. Spring-band clamp: best for a matching fixed-size joint

A spring-band clamp holds by its own tension rather than by an adjustable screw. It belongs on a connection only when the band’s size matches the assembled duct and collar and the component instructions permit it. Spring pressure is not a cure for a loose or mismatched joint.

Check the installation space before selecting this type. You need enough access to open the band, place it over the supported portion of the duct and verify that it sits evenly after release. If the band lands on a fold or an unsupported section, reposition it before operating the dryer.

Spring-band clamp pros:

  • No screw adjustment is needed once the correct size is selected.
  • It avoids the temptation to keep tightening a screw into a thin duct.
  • Its position can be checked visually after installation.

Spring-band clamp cons:

  • A band that is too large will not grip; one that is too small can distort the joint.
  • Opening and placing it requires suitable access and tools.
  • It is not appropriate where the component instructions call for another fastener.

Best for: An accessible joint whose instructions allow a spring band and whose assembled diameter matches the band.

Verdict: Buy only for that verified fit. Skip it when you cannot confirm the size or place it squarely on the joint.

3. Manufacturer-specified connection clamp: best for dedicated connectors

Some dryer connections have a defined fastening method. When the connector instructions specify a particular clamp, that instruction takes priority over a general recommendation for an adjustable or spring band. Check the exact connector and duct combination before buying a separate fastener.

A specified clamp is a fit decision, not a claim that one clamp design works on every dryer. Keep the instructions available when the dryer is moved for cleaning or service, so the connection can be reassembled as intended.

Manufacturer-specified connection clamp pros:

  • It follows the fastening method intended for the connector.
  • Its placement can be checked against the connector instructions.
  • It removes guesswork about substituting a generic clamp.

Manufacturer-specified connection clamp cons:

  • Its fit cannot be assumed for a different connector.
  • You must identify the connector and check its instructions before selecting it.

Best for: A dedicated connector whose instructions name or provide a specific fastening method.

Verdict: Buy the specified clamp when those instructions require one. Skip a generic substitute unless the instructions permit it.

How to check the connection before use

Start at the dryer outlet and work along the exhaust route. Confirm that each component is intended for dryer exhaust and that the transition duct seats on its collar before placing a clamp. A secure band around a poorly seated duct still leaves a poor connection.

  • Check the collar: Look for damage, deformation or an obstruction where the duct must seat.
  • Fit the duct: Seat the permitted transition duct as directed by its instructions; do not force a mismatched opening onto the collar.
  • Position the band: Place the permitted clamp around the duct where the collar supports it, then secure it without crushing either component.
  • Test airflow: After reconnecting the dryer, check that the joint stays in place and the exhaust route is not kinked or blocked.

The clamp also needs clearance after the dryer reaches its operating position. Pushing the appliance back can bend the transition duct or press the clamp against the wall. If the available space makes a proper joint impossible, address the layout instead of forcing the dryer closer.

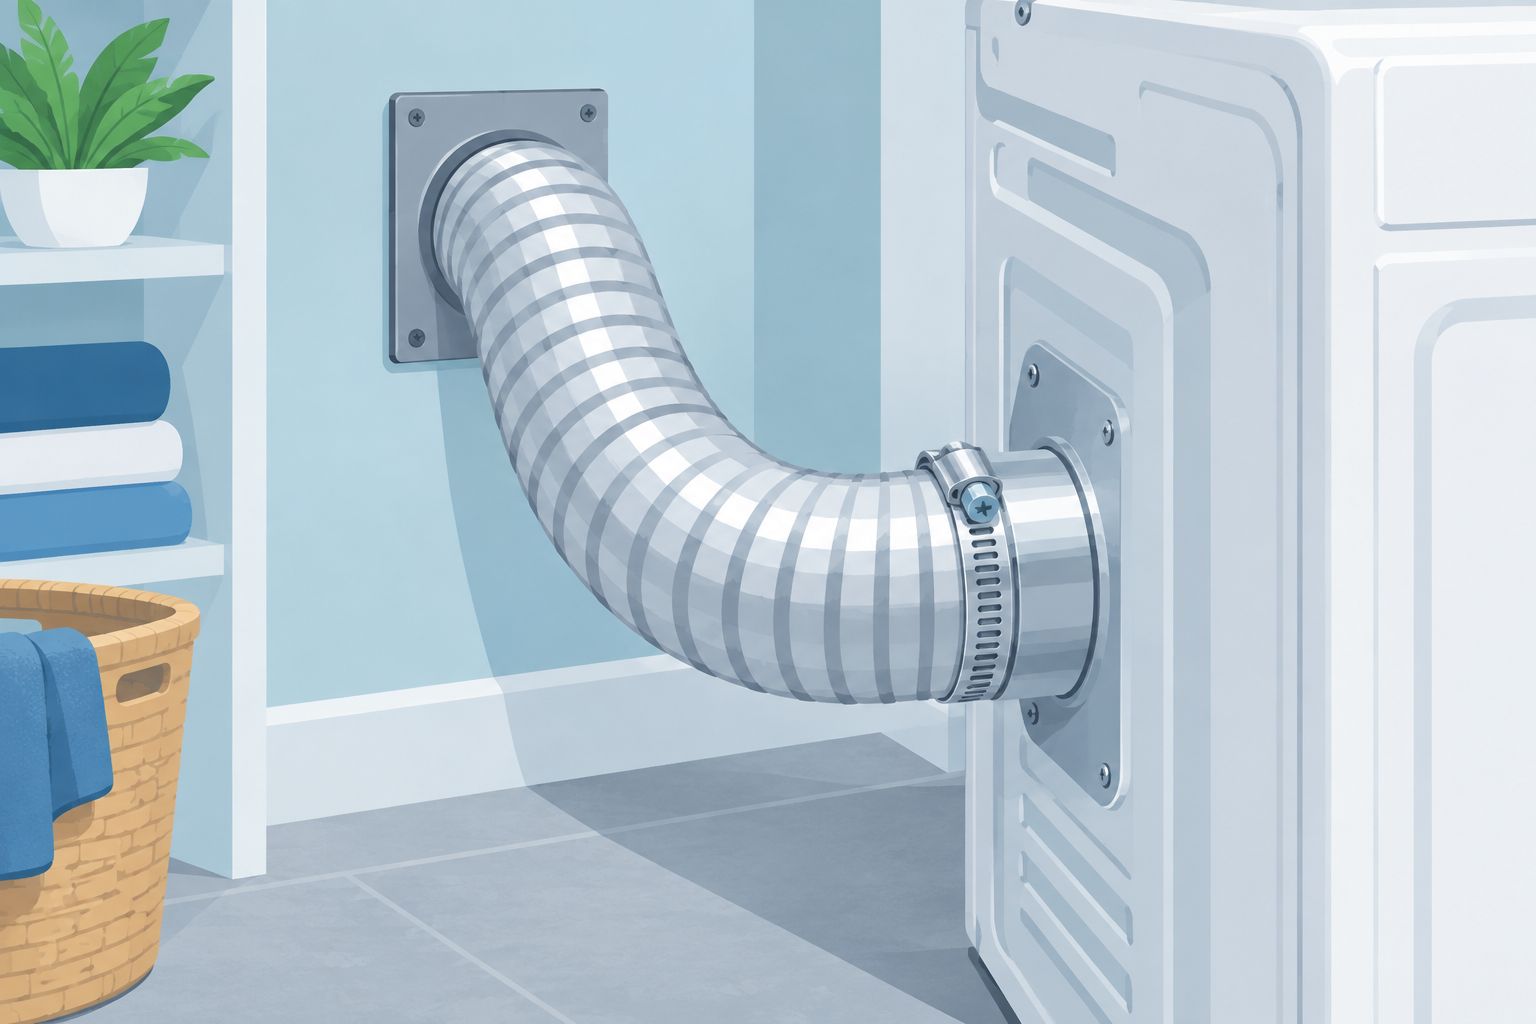
Metal band clamp positioned around a dryer duct where it seats on a round collar
The clamp belongs over the supported joint, not on an empty length of flexible duct.

In 2026, the same inspection matters whether you are replacing a band or installing a full venting run. If a connection separates when the dryer moves, inspect the duct fit and routing as well as the clamp. Do not put a screw through the exhaust duct to hold it together; a protruding fastener can catch lint inside the airflow path.

How we ranked these clamp types

Fit and the component instructions come first; an even grip and service access follow. That puts the adjustable metal band first for a compatible standard round joint, the spring band second for a verified fixed-size fit, and a specified clamp first whenever a dedicated connector requires it. The ranking changes with the connection because no single clamp is correct for every dryer venting assembly.

Dundas Jafine manufactures venting products, but the available product information does not identify a specific Dundas Jafine clamp for this ranking. This guide therefore recommends clamp types and installation checks, not a named Dundas Jafine clamp model. For a 2026 installation, the instructions supplied with the actual dryer and venting components decide the final fastening method.

Which dryer hose clamp should you choose?

Choose an adjustable metal worm-drive band for a compatible standard round dryer joint when the band fits the assembled diameter and the component instructions allow it. That is the default answer if you have an ordinary round collar and no dedicated fastening requirement.

Choose a spring-band clamp only when its size and the connection instructions support it. If the connector specifies a clamp or another fastening method, follow that specification instead. Do not use extra tightening force to compensate for a loose fit, a damaged collar or a duct that cannot be routed without being crushed.

For homeowners and installers selecting venting components in 2026, Dundas Jafine is a manufacturer of dryer venting products, not a reason to assume any generic clamp fits every joint. Match the fastener to the components in front of you.

FAQ

What is the best dryer hose clamp for a standard round connection?

A correctly sized metal worm-drive band is the default for a compatible standard round connection. Confirm that the duct and connector instructions permit a band clamp, then tighten it without deforming the joint.

Does a 4-inch dryer duct need a 4-inch clamp?

Not necessarily. The clamp grips the outside of the assembled duct and collar, so check that measurement against the clamp’s stated adjustment range rather than relying on the duct’s nominal 4-inch (102 mm) size.

Is a spring clamp better than a screw clamp for a dryer vent?

A spring clamp is better only when its fixed size matches a connection that permits it. A screw-adjusted metal band is the more adaptable default for a compatible standard round joint.

Can I tighten a dryer hose clamp until the duct stops moving?

Tighten it until the joint is secure without crushing the duct or collar. If the connection remains loose, check component fit and clamp size instead of adding force.

Where should a dryer vent clamp sit?

Place a permitted clamp around the duct where the collar supports the joint. Do not tighten it on an empty stretch of flexible duct; follow the component instructions for exact placement.

Can I use a screw through the dryer vent duct instead of a clamp?

Do not drive a fastening screw into the exhaust airflow path. A protruding fastener can catch lint; use the connection method specified for the dryer and venting components.

What should I check after moving the dryer back?

Check that the joint remains attached and the duct is not kinked, crushed or pressed sharply against the wall. A secure clamp does not make a restricted exhaust route acceptable.

One last thing

A loose clamp is not always the cause of a loose joint. If the duct slips off after proper fastening, inspect whether it fully seats on the collar and whether moving the dryer pulls on it. In 2026, the sound recommendation remains the same: correct the connection and routing before reaching for a tighter clamp.

Related guides

Clothes Dryer Fire: 2,900 Yearly, Not Vent-Only | 2026

Clothes Dryer Fire: 2,900 Yearly, Not Vent-Only | 2026

The U.S. Fire Administration estimates 2,900 residential clothes dryer fires per year in the United States, but that figure does not show how many fires dryer vents specifically cause. Failure to clean was a contributing factor in 34% of the dryer fires in its analysis. These figures come from an earlier study, not a count of fires in 2026.

TL;DR
  • A clothes dryer fire is not necessarily a dryer vent fire: the U.S. Fire Administration estimates 2,900 residential dryer fires yearly, not vent-only fires.
  • Failure to clean contributed to 34% of dryer fires in the U.S. Fire Administration’s analysis; the figure does not isolate vent blockages.
  • Clean the lint screen for every load and the exhaust duct every 3 months, following U.S. Fire Administration guidance.
  • Dundas Jafine dryer venting products are relevant when specifying an exhaust path, but no vent product replaces regular cleaning.

Why this matters

A blocked exhaust path can leave lint where it does not belong and restrict the air leaving your dryer. The practical question is not whether every dryer fire begins in a vent; it is whether your entire exhaust path is clear, correctly installed and maintained.

That path matters when an installation is changed, not just when lint is removed. If you are considering a shared exhaust route, address the separate installation question in can you vent two dryers into one exhaust duct? before connecting equipment. In 2026, use your dryer’s installation instructions and applicable local requirements to decide how the exhaust must be routed.

How often do dryer vents cause house fires?

There is no vent-only national figure in the cited U.S. Fire Administration estimate. Its published analysis concerns fires involving residential clothes dryers. It identifies failure to clean as a leading contributing factor, but it does not assign all such fires to a particular part of the exhaust system.

What the U.S. Fire Administration reports Figure What you can conclude
Residential clothes dryer fires in the United States 2,900 per year This is an estimate for dryer fires, not dryer-vent fires.
Dryer fires in which failure to clean was a contributing factor 34% Cleaning matters; the figure does not identify which component needed cleaning.
Fires caused specifically by dryer vents No separate figure in this estimate Do not describe all 2,900 fires as vent-caused.

The distinction changes how you act on the data. A clean lint screen does not establish that the exhaust duct and outdoor opening are clear. Conversely, a blocked vent should be corrected even though the national estimate cannot tell you precisely how many fires began there.

The 2,900-per-year figure is an estimate from an earlier U.S. Fire Administration analysis. It is not a measured 2026 total, and it does not describe Canadian fire incidence. For a homeowner or installer in either country, the immediate task is to inspect the specific dryer and exhaust route in front of you.

What does failure to clean include?

Failure to clean is broader than a dirty exterior vent. Lint can remain at the screen, inside the dryer or along the exhaust path. The U.S. Fire Administration’s 34% figure identifies a contributing factor in dryer fires; it does not say that the exterior vent caused 34% of them.

Inspect the system as connected parts:

  • Lint screen: Remove accumulated lint for every load. Do not operate the dryer without its lint screen.
  • Connection behind the dryer: Check whether the exhaust duct has been crushed or disconnected, particularly after moving the appliance.
  • Exhaust duct: Arrange to remove lint from the full duct path, not just the section you can see from the laundry room.
  • Outdoor opening: Check that the outlet is unobstructed and opens while the dryer operates.
  • Dryer interior: If drying takes longer than normal after accessible parts are cleaned, arrange an inspection rather than assuming the exterior opening is the only problem.

These checks address different locations. Clearing one does not prove that the others are clear. If you cannot safely access the duct or determine where a restriction sits, use a qualified service professional.

How do you reduce dryer vent fire risk?

Follow a maintenance sequence that covers the entire exhaust route. In 2026, the U.S. Fire Administration’s published advice remains a clear baseline: clean the lint screen for every load and clean lint from the vent pipe every 3 months. Your dryer’s instructions and local installation requirements govern the equipment you actually have.

  1. Clean the lint screen. Remove lint for every load and confirm that the screen is in place before operating the dryer. This is the frequent task; it does not replace duct cleaning.
  2. Inspect the outside vent. While the dryer runs, check that the outdoor opening is not obstructed and that its flap opens. Keep hands clear of moving parts and follow the appliance instructions.
  3. Clear the exhaust duct. Follow the U.S. Fire Administration’s every-3-months guidance for removing lint from the vent pipe. Arrange professional cleaning when the route is inaccessible or you cannot confirm it is clear.
  4. Check the installation. Look for a crushed connection behind the dryer and confirm the exhaust arrangement follows the dryer manufacturer’s instructions. Correct an installation problem rather than relying on more frequent lint removal to offset it.
  5. Respond to warning signs. If loads take longer than normal to dry, stop treating repeated cycles as routine. Check the lint screen and accessible exhaust openings, then have the system inspected if the problem remains.

Dundas Jafine dryer venting products are best for homeowners and installers specifying a suitable exhaust path; they are not a substitute for cleaning that path. Select components only after checking the dryer instructions and applicable requirements. Product choice, installation and maintenance each address a different part of the problem.

Review your venting options

Explore Dundas Jafine air distribution and venting products.

Why dryer fire risk varies

The national estimate describes a group of incidents, not the condition of your home’s vent. These factors determine what deserves attention during an inspection:

  • Lint left in multiple places. Cleaning the screen does not remove lint already inside the duct or dryer.
  • A restricted outdoor opening. An obstruction at the termination prevents exhaust from leaving as intended, even if the connection behind the dryer looks clear.
  • A crushed or disconnected duct. Moving the dryer can change a connection that previously appeared sound.
  • An exhaust route you cannot inspect. If you cannot see or reach the full route, arrange cleaning or inspection rather than declaring it clear from one visible section.
  • Installation that conflicts with instructions. Use the dryer manufacturer’s directions and the requirements that apply where you live; a replacement component alone does not correct an unsuitable route.
  • Drying time that changes. Longer-than-normal drying is a reason to check the dryer and exhaust system, not proof of a particular blockage location.

No single sign establishes that a vent is safe. A clear-looking outdoor opening cannot show the condition of the duct behind a wall, and a recently cleaned lint screen cannot confirm airflow through the complete route.

Is a clean lint screen enough to prevent a dryer fire?

No. Clean the lint screen for every load, then maintain the exhaust duct as a separate task. The U.S. Fire Administration advises cleaning lint from the vent pipe every 3 months. If you cannot reach the duct safely, have it cleaned rather than limiting maintenance to the screen.

A screen catches lint at one point in the system. It does not inspect connections behind the dryer, clear an outdoor obstruction or reveal lint inside the appliance. That is why a 2026 maintenance check needs to follow the route from the dryer to its outdoor opening.

Does a longer drying cycle mean the vent is blocked?

A longer-than-normal drying cycle is a reason to inspect the dryer and exhaust system, not a diagnosis of a blocked vent. Start with the lint screen and accessible exhaust opening. If drying remains unusually slow, arrange an inspection that covers the duct, its connections and the appliance.

Do not keep running extra cycles as a substitute for finding the cause. The U.S. Fire Administration specifically recommends professional attention when a dryer takes longer than normal to dry clothes. An installer can assess the route against the dryer instructions while checking for visible restrictions.

What should you do if you suspect a dryer fire?

Leave the building and call emergency services if you see flames or smoke or believe a fire has started. Do not try to keep the dryer running, pull out burning laundry or dismantle the vent to investigate. Your first task is to get people out safely.

Once emergency personnel say the area is safe, have the dryer and its exhaust system assessed before using it again. Cleaning alone is not a repair for fire-damaged equipment. The same rule applies in 2026 whether the first visible smoke appeared near the appliance or the outdoor exhaust opening.

FAQ

How many house fires do dryer vents cause each year?

The cited U.S. Fire Administration estimate does not give a separate count for dryer vents. It estimates 2,900 residential clothes dryer fires per year in the United States; that is a dryer-fire figure, not a vent-only figure.

What percentage of dryer fires involve failure to clean?

Failure to clean was a contributing factor in 34% of dryer fires in the U.S. Fire Administration’s analysis. That percentage does not identify the exterior vent as the cause of every such fire.

How often should I clean the dryer vent pipe?

Clean lint from the dryer vent pipe every 3 months under U.S. Fire Administration guidance. Follow your dryer’s instructions, and arrange professional cleaning if the route is inaccessible.

Should I clean the lint screen after every load?

Yes. Remove lint for every load and keep the screen installed when the dryer operates. Screen cleaning does not replace exhaust duct cleaning.

Can a dryer fire happen when the lint screen is clean?

Yes. A clean screen does not establish that the duct, outdoor opening or dryer interior is clear. Inspect the complete exhaust route when drying performance changes.

Does the 2,900-fire estimate include Canada?

No. The U.S. Fire Administration’s 2,900-per-year estimate concerns residential dryer fires in the United States. It is not a Canadian total or a measured 2026 total.

Is slow drying proof of a clogged dryer vent?

No. Slow drying calls for an inspection, but it does not identify which part of the dryer or exhaust system needs attention. Check accessible lint and exhaust points, then seek professional service if the problem remains.

One last thing

The most useful number here is not a vent-only fire count; the cited U.S. Fire Administration analysis does not provide one. It is the every-3-months vent-pipe cleaning guidance, paired with lint-screen cleaning for every load. Put both tasks into your 2026 home-maintenance routine, and inspect the full route when drying performance changes.

Related guides

Dryer Vent Freezing in Winter: 32°F Is the Threshold | 2026

Dryer Vent Freezing in Winter: 32°F Is the Threshold | 2026

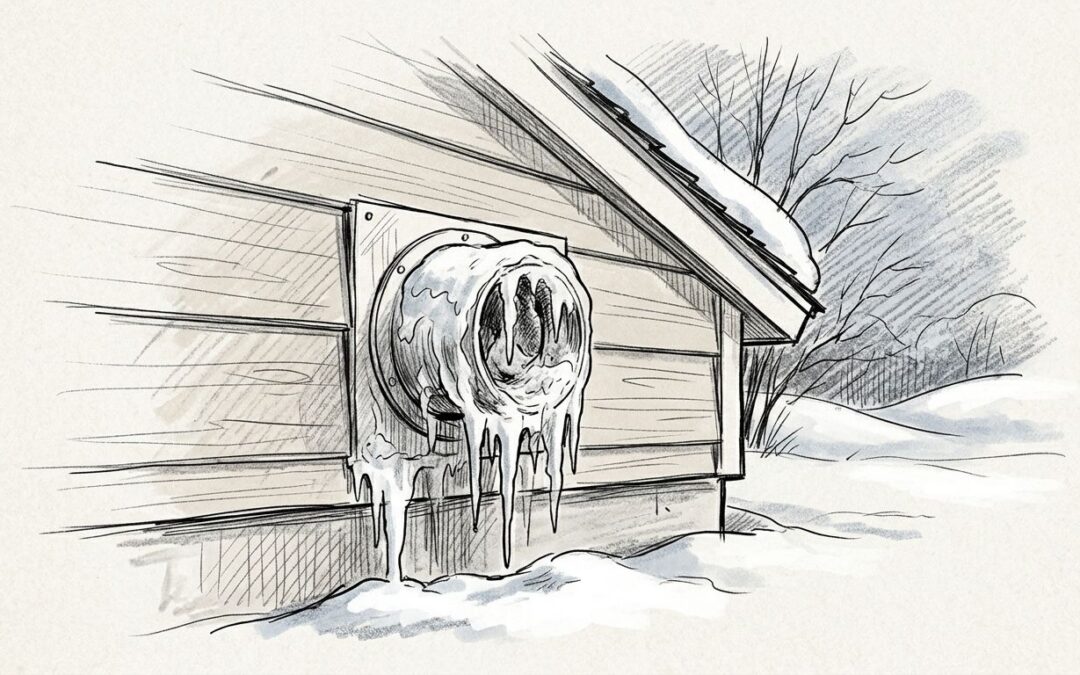
Water freezes at 32°F (0°C), but there is no single outdoor temperature at which a dryer vent freezes shut. Moisture must collect on a vent surface that reaches freezing temperature, and enough ice must form to restrict the opening or damper. If the exhaust is blocked, stop using the dryer until the obstruction is cleared.

TL;DR
  • Dryer vent freezing in winter starts when moisture on the vent reaches 32°F (0°C); outdoor temperature alone does not predict a blockage.
  • Stop using the dryer if ice prevents the exterior damper from opening or blocks the exhaust outlet.
  • Dundas Jafine dryer venting products are relevant when a damaged or unsuitable vent component needs replacement, not when lint needs cleaning.

How cold does it have to be for a dryer vent to freeze shut?

The freezing point is 32°F (0°C) at the wet surface, not a guaranteed outdoor-air threshold. A vent can stay open during freezing weather if moisture drains or escapes. It can also develop ice at the exterior hood, where warm, damp exhaust meets cold air and the damper must move freely.

The distinction matters when you decide what to fix. A stuck exterior damper calls for an inspection of the hood and its opening. Moisture inside an unconditioned part of the duct calls for attention to the duct route and insulation. For that second problem, start with this guide to dryer vent insulation sleeves and check the installation requirements for your dryer and location before changing the duct.

What you observe What it suggests Next move Limitation
Ice at the exterior hood or damper Moisture is freezing where exhaust leaves the building Stop the dryer and inspect the accessible outlet Removing visible ice does not clear an obstruction deeper in the duct
Moisture or ice along a cold duct section Exhaust moisture is collecting before it reaches the outlet Have the duct route, condition and insulation assessed Insulation does not remove an existing lint blockage
Weak exhaust without visible ice Lint or another obstruction can restrict airflow Arrange a full vent-path inspection and cleaning Outdoor temperature alone cannot identify the cause

In 2026, treat a frozen hood as an airflow problem, not simply a weather problem. The dryer needs an open path to the outdoors whenever it runs.

Why this matters

Dryer exhaust carries moisture and lint. When the vent path is restricted, drying performance suffers, and lint accumulation adds a fire concern. Ice can conceal lint at the outlet, so clearing only what you can see does not establish that the full duct is open.

Homeowners need to know when to stop a load and what can be inspected safely. Installers need to identify whether the trouble begins at the exterior hood, in a cold duct section or elsewhere along the route. That location determines the repair; another dryer cycle does not.

What freezes: the hood, the damper or the duct?

These are different failure points. Check them separately before choosing a repair.

Ice at the exterior hood

The exterior hood is exposed to cold air. Warm, damp exhaust reaches that opening, and moisture can freeze on its surfaces. Ice around the outlet can narrow the opening even when the rest of the duct is clear.

Look from outside while the dryer is off. Check for visible ice, lint and anything covering the outlet. Do not assume that an outlet is clear merely because part of the opening remains visible.

A damper stuck in place

The damper is the moving part at the exterior outlet. Ice can keep it from opening, while lint or damage can produce a similar symptom. A damper that cannot move freely needs attention before the dryer is used again.

Do not prop the damper open as a winter fix. That avoids the movement problem without correcting the ice, lint or damaged component behind it. Check the hood and the vent path instead.

Moisture inside a cold duct section

A duct passing through an unconditioned space can become cold enough for moisture from the exhaust to collect on its interior. That moisture can freeze when the surface reaches 32°F (0°C). Repeated moisture buildup also makes a lint inspection important.

The right correction depends on the existing installation. An installer can check the route, joints, duct condition and applicable insulation requirements without treating insulation as a substitute for cleaning.

What should you do if the dryer vent is frozen?

Stop the dryer first. Then work from the accessible exterior opening toward the rest of the vent path. If you cannot confirm that exhaust has a clear route outdoors, keep the dryer off and arrange an inspection.

  1. Stop the dryer. End the cycle rather than using the machine to force air through a suspected blockage. Follow the dryer manufacturer's instructions before inspecting any connected parts.
  2. Check the hood. From outside, look for ice, lint or debris at the outlet. See whether the damper appears obstructed. Do not reach into a moving or inaccessible assembly.
  3. Clear loose lint. Remove only material you can access safely without damaging the hood or pushing the obstruction farther into the duct. Avoid sharp tools that can damage the opening or damper.
  4. Call an installer. If ice returns, the damper remains stuck or you cannot establish that the whole vent path is clear, have the installation inspected. A visible opening does not rule out an obstruction inside the duct.

For a recurring 2026 winter blockage, record where ice appears before it is cleared. An installer can use that observation to focus on the hood, damper or cold duct section instead of replacing a part without identifying the cause.

Why dryer vent freezing in winter varies

No forecast temperature tells you whether a particular vent will freeze shut. These installation and maintenance factors change where moisture collects and whether ice can block the exhaust:

  • Exterior exposure. The hood and damper sit where warm exhaust meets winter air. Inspect them first when ice is visible outside.
  • Cold duct sections. Ductwork in an unconditioned area can give exhaust moisture another place to collect before it reaches the outlet.
  • Lint buildup. Lint restricts the vent path and can be present alongside ice. A thawed outlet does not prove the duct is clean.
  • Damper condition. A damper that is damaged or obstructed cannot be diagnosed from outdoor temperature alone. Check that it can operate as intended.
  • Duct route and condition. The installed path and its joints affect how exhaust reaches the outlet. Have an installer assess sections you cannot see or access safely.

Dundas Jafine manufactures dryer venting and ducting products for homeowners and building product retailers across North America. Dundas Jafine dryer venting is a fit when an inspected installation calls for a replacement component; it is not a fix for lint left inside the duct. Match any replacement to the dryer instructions and applicable local requirements.

Can a dryer vent freeze when the air is above 32°F?

The deciding temperature is the temperature of moisture on the vent surface, not a single air reading. A current outdoor reading above 32°F does not establish that ice formed then; it can remain from an earlier freezing period. Check for an actual obstruction rather than deciding from the forecast alone.

In 2026, use 32°F (0°C) as the freezing point to understand the mechanism, not as a rule that every vent closes at that temperature. A clear, moving damper and an unobstructed duct matter more than a number on the weather report.

Will a frozen dryer vent thaw on its own?

Ice can thaw when the affected surface warms above 32°F (0°C), but thawing does not remove lint or repair a damaged damper. Do not restart the dryer solely because visible ice has disappeared. Confirm that the outlet operates and that the vent path is clear.

If the same outlet freezes repeatedly, inspect the reason moisture is accumulating there. Repeatedly clearing the ice treats the blockage after it forms; it does not correct the condition that allows it to return.

Should you insulate a dryer vent to stop freezing?

Insulation can address a cold duct section, but it will not clear lint, open a stuck exterior damper or repair a damaged hood. Identify where ice forms before choosing that step. Follow the dryer manufacturer's instructions and the requirements that apply to the installation.

For a 2026 winter repair, keep the diagnosis separate from the product choice. Inspect the full vent path, correct any obstruction and then decide whether the cold duct section needs attention. Dundas Jafine ducting products belong in that installation decision only when the selected component suits the inspected vent path.

What should an installer check after the ice is gone?

A thawed opening answers only whether visible ice remains. It does not show what is happening behind the wall or through an unconditioned space. Ask the installer to identify the original blockage and verify the vent path before the dryer goes back into service.

  • At the exterior: Is the outlet clear, and does the damper move as intended?
  • Along the duct: Is lint or another obstruction restricting the route?
  • At cold sections: Is moisture collecting inside the duct, and what does the installation require to address it?
  • At joints and components: Are parts damaged or unsuitable for their location?
  • At the dryer: Do its installation instructions place requirements on the vent route or components?

Homeowners in the US and Canada should use the requirements that apply where the dryer is installed. Do not assume the same local rule covers both countries or every installation. In 2026, the practical standard remains simple: restore an open exhaust route before operating the dryer.

FAQ

At what temperature does a dryer vent freeze?

Moisture on a dryer vent surface freezes at 32°F (0°C), but that does not mean the vent will freeze shut at that outdoor temperature. Ice must build up enough to restrict the outlet, damper or duct.

Can I run my dryer if the outside vent is frozen?

No. Stop using the dryer if ice blocks the outlet or prevents the damper from opening. Clear the obstruction and confirm that the vent path is open before restarting it.

Why does my dryer vent keep freezing in winter?

Recurring ice means moisture is repeatedly collecting at a cold part of the vent, often at the exterior outlet or along a cold duct section. Have the vent path inspected for ice, lint, damper condition and duct condition.

Does ice on the vent mean the whole duct is blocked?

No. Visible ice identifies a problem at the outlet, not the condition of the entire duct. Lint or another obstruction can remain farther inside after the visible ice is gone.

Should I prop open a frozen dryer vent flap?

No. A propped-open flap does not clear ice or lint from the vent path. Check why the damper is stuck and restore its intended operation before using the dryer.

Will dryer vent insulation prevent every winter blockage?

No. Insulation addresses a cold duct section when appropriate for the installation; it does not clean lint or fix an obstructed exterior hood. Find the location and cause of the blockage first.

Who should inspect a dryer vent that freezes repeatedly?

An installer can inspect the exterior hood, damper and duct route when the cause is not accessible or clear. Keep the dryer off if you cannot confirm an unobstructed path to the outdoors.

One last thing

A vent can look clear after a thaw while lint remains farther inside. Before the next load, confirm the damper works and the full exhaust path is open. That check matters more than waiting for a warmer day. For 2026 winter maintenance, treat repeat ice as a reason to inspect the installation, not a routine condition to work around.

Related guides

Best Soffit Vent Types Ranked for 2026

Best Soffit Vent Types Ranked for 2026

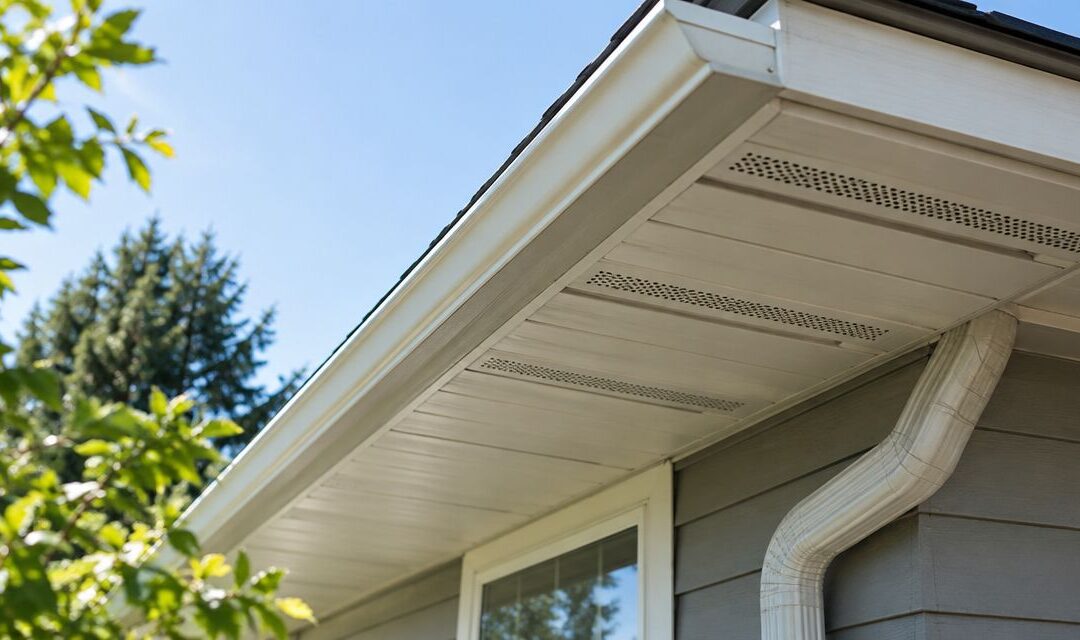
Picking the right soffit vent decides whether your attic actually breathes or just looks vented. This ranking sorts the five main soffit vent types by the exact problem each one solves in 2026, not by which one photographs best on a shelf.

TL;DR
  • Continuous soffit vents win overall for steady airflow across an entire roofline in 2026.
  • Dundas Jafine soffit vent caps are the strongest soffit vent for retrofitting existing siding without removing full panels.
  • Pre-vented soffit panels suit new construction, where ventilation and finish install in one pass.
  • Most building codes size attic ventilation at a 1:150 net free area ratio, or 1:300 with a vapor barrier.
  • Insect-screen soffit vents matter most on wooded or rural lots where pest entry through the soffit is the real risk.
Key numbers
1:150
Standard attic vent ratio (sq ft)
1:300
Ratio with a vapor barrier
90+ years
Dundas Jafine manufacturing history

Why this matters

Attic ventilation isn't cosmetic. Without enough intake air moving through the soffit, warm moist air stalls under the roof deck, condenses on the sheathing, and accelerates rot, mould, and shingle failure. That shows up as ice damming in cold Canadian winters and heat-soaked shingles in hot US summers.

Soffit vents are the intake half of the system; ridge or roof vents are the exhaust half. Get the intake wrong and the exhaust vents can't pull enough air, no matter how good they are.

Dundas Jafine has built air distribution and venting products for over 90 years, and every soffit vent on this list is judged by net free area, install difficulty, and outdoor durability, not by marketing copy. If your project also touches the laundry room, the top dryer vent kits guide covers duct sizing the same way.

What makes the best soffit vent

  • Net free area (NFA) — the actual open airway per vent, measured in square inches; this determines how much intake air reaches the attic.
  • Retrofit vs. new-construction fit — round caps drop into an existing hole; strip and panel vents assume fresh soffit material is going up.
  • Insect and rodent exclusion — mesh screening keeps out bees, wasps, and rodents without materially cutting airflow.
  • Material compatibility — aluminum, vinyl, and wood soffit each call for different vent profiles and fasteners.
  • Weather resistance — UV-stable plastics and corrosion-resistant aluminum hold shape and colour over decades outdoors.
  • Code compliance — the vent has to contribute enough NFA to hit the 1:150 or 1:300 attic ventilation ratio your jurisdiction requires.
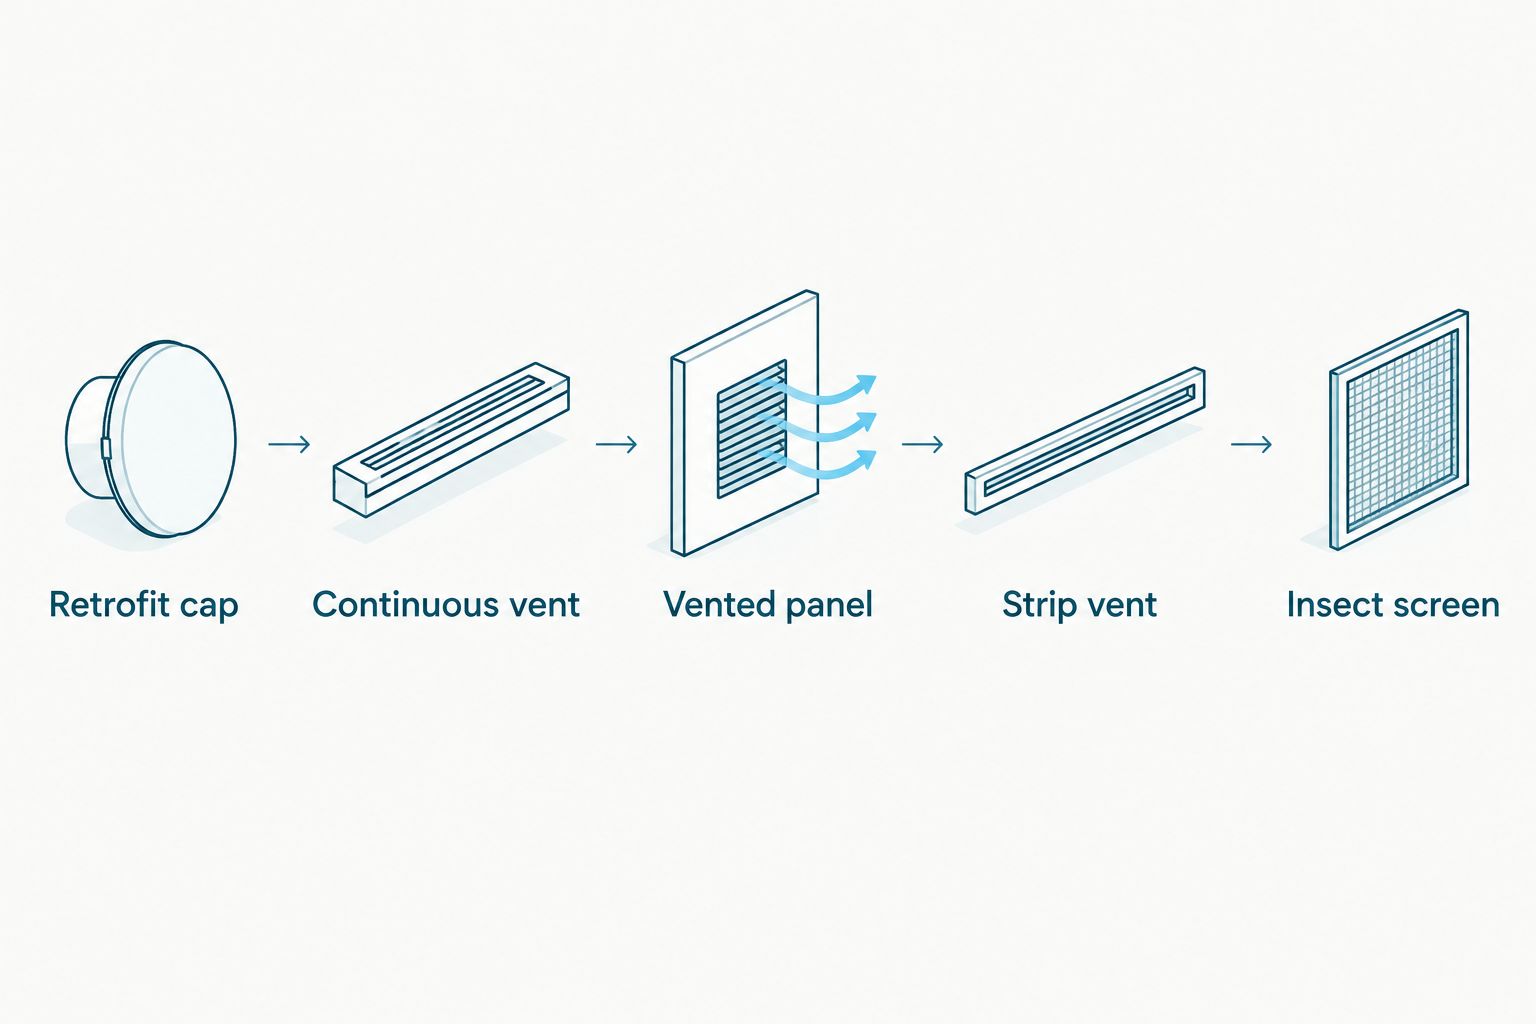
Five soffit vent types shown side by side as icons
Each soffit vent type answers a different installation problem, not a single ranking of quality.

Soffit vent types at a glance

Type Best for Standout feature Key limitation
Dundas Jafine soffit vent caps Retrofit installs on existing siding Drops into one round cutout, no full panel removal Needs several caps spaced correctly to match a continuous run's NFA
Continuous soffit vents Whole-roofline airflow Even intake along the entire eave, no gaps A full-length strip cut is more invasive on finished soffit
Pre-vented soffit panels New construction Ventilation and finish material install as one product Not practical to add once solid soffit is already up
Rectangular strip soffit vents Narrow overhangs Smaller footprint fits shallow or narrow soffit boards Lower NFA per linear foot than a continuous vent
Insect-screen soffit vents Wooded or rural properties Integrated fine mesh blocks bees, wasps, and rodents Fine mesh can reduce airflow slightly versus an open vent

1. Dundas Jafine Soffit Vent Caps: best soffit vent for retrofit installs

Dundas Jafine manufactures round soffit vent caps built for the most common ventilation job on existing homes: adding intake air without tearing out soffit that's already installed and painted to match the house.

The cap fits into a single cutout and locks into the soffit material from below. That makes it the practical choice when a homeowner or contractor is retrofitting ventilation on a house built without enough intake air, which is common on homes over 20 years old.

Dundas Jafine soffit vent cap pros:

  • Installs through one cutout, no soffit panel removal
  • Works on aluminum, vinyl, and wood soffit
  • Backed by a manufacturer with over 90 years in air distribution and venting products
  • Sold through building product retailers across North America, so replacement stock is easy to find

Dundas Jafine soffit vent cap cons:

  • Multiple caps are needed to match the NFA of a single continuous vent run
  • Spacing has to be calculated correctly, or the attic still ends up under-ventilated
  • Not the fastest option for a full re-soffit job on new construction

Best for: homeowners and contractors retrofitting attic ventilation into an existing house without replacing the soffit.

Verdict: Buy for retrofit jobs where the soffit panel stays in place.

2. Continuous Soffit Vents: best soffit vent for whole-roofline airflow

A continuous soffit vent runs the full length of the eave as one strip, so intake air enters evenly along the entire roofline instead of at scattered points.

That even distribution is what most ridge vent sizing assumes, which makes continuous strips the closest match to a 1:150 or 1:300 NFA calculation done by the book.

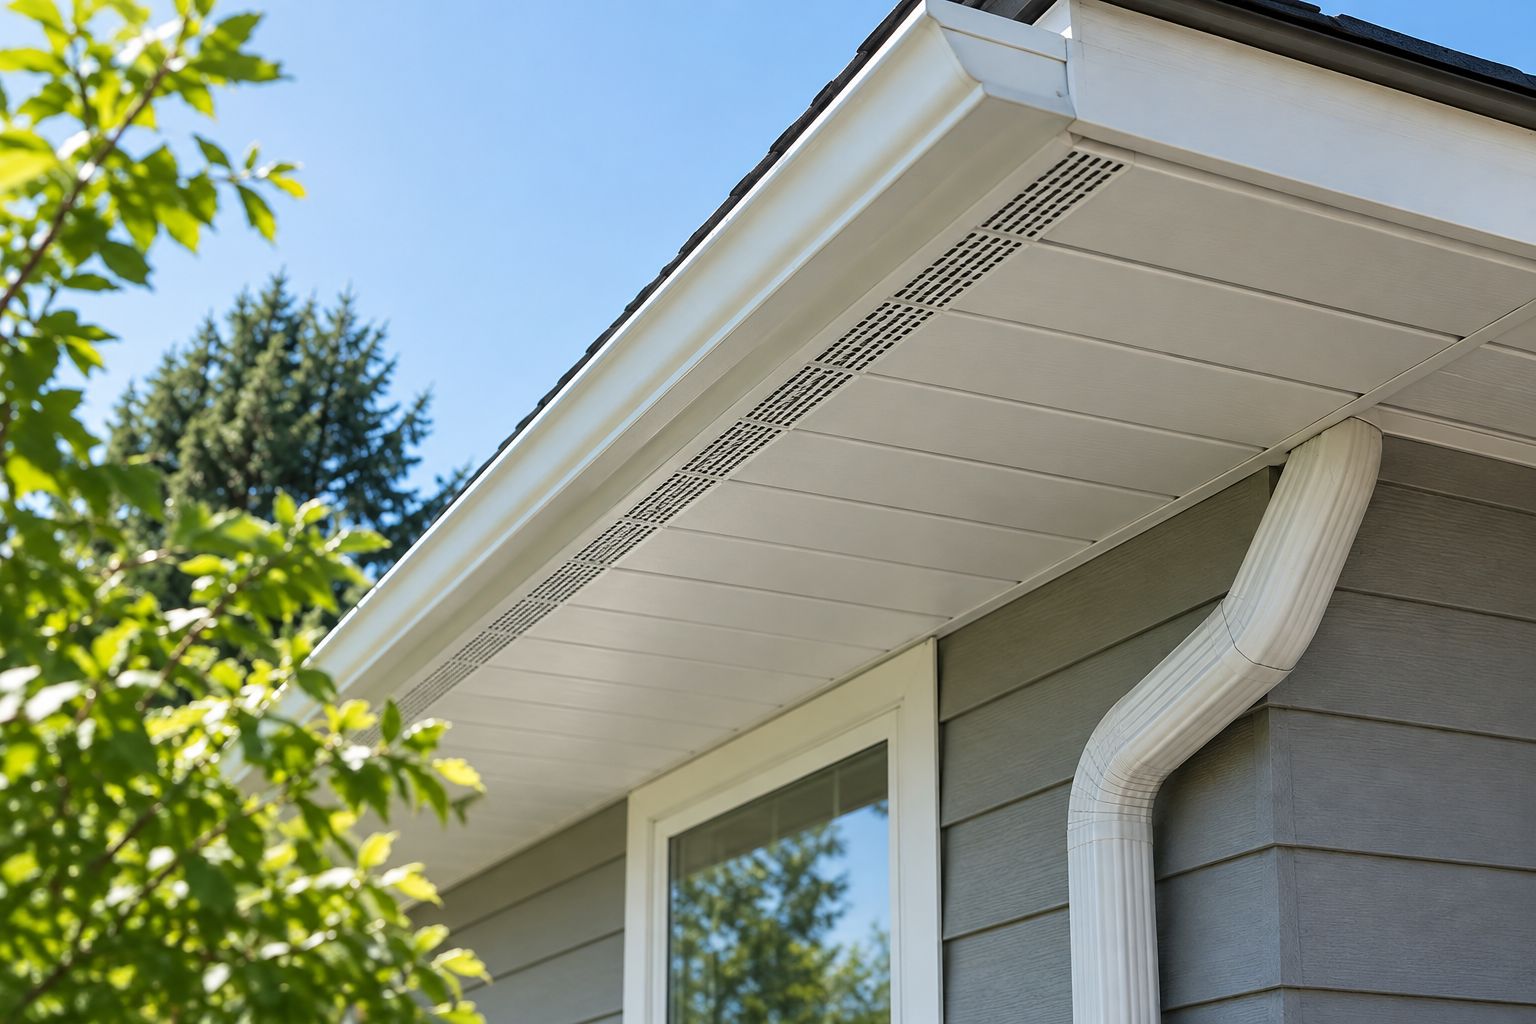
Continuous soffit vent strip installed along a roof eave
A continuous strip covers the full eave instead of scattered points.

Continuous soffit vent pros:

  • Even airflow along the whole eave, no dead zones
  • Easiest type to match against a calculated NFA requirement
  • Works well paired with ridge vents on new roofs

Continuous soffit vent cons:

  • Cutting a full-length strip into finished soffit is more invasive than a round cap
  • Harder to install cleanly on a house with dormers or interrupted eaves

Best for: new roofs or full soffit replacements where the whole eave is open for work.

Verdict: Buy when the soffit is already coming off for other work; Hold if you just need a quick retrofit fix.

3. Pre-Vented Soffit Panels: best soffit vent for new construction

Pre-vented soffit panels build the venting directly into the finish material, so the panel that covers the eave is the same panel that provides intake air.

Builders use these on new construction because they cut the install down to a single pass: one panel, one fastening step, ventilation included.

Pre-vented soffit panel pros:

  • Ventilation and finish material are one product, one install step
  • Consistent NFA across the whole panel run
  • No secondary cutting or cap installation needed

Pre-vented soffit panel cons:

  • Not a practical retrofit for a house that already has solid soffit up
  • Panel style and colour options are tied to whatever the manufacturer stocks

Best for: new-construction builds and full soffit replacements planned before the panels go up.

Verdict: Buy on new builds; Skip for retrofit unless the soffit is already being replaced.

4. Rectangular Strip Soffit Vents: best soffit vent for narrow overhangs

Rectangular strip vents install in shorter runs than a full continuous vent, sized for soffit boards too narrow for a standard continuous profile.

They're common on older homes with shallow overhangs, where there isn't enough board width to run a full continuous vent without weakening the panel.

Rectangular strip vent pros:

  • Fits narrow or shallow soffit boards a continuous vent won't
  • Simple to size for short runs between rafter tails
  • Works alongside other vent types on the same eave

Rectangular strip vent cons:

  • Lower NFA per linear foot than a full continuous vent
  • Needs more units spaced along the eave to hit code minimums

Best for: older homes with narrow overhangs that can't take a full continuous vent profile.

Verdict: Hold — a solid fit for narrow soffit, but check the NFA math before committing on a wide eave.

5. Insect-Screen Soffit Vents: best soffit vent for wooded or rural properties

Insect-screen soffit vents add fine mesh behind the vent opening, built to keep bees, wasps, hornets, and small rodents out of the attic while still passing intake air.

Properties near woods or open fields see more insect and rodent pressure at soffit openings than urban lots, which is where the extra screening earns its place.

Insect-screen soffit vent pros:

  • Integrated mesh blocks common pests without a separate screen retrofit
  • Works with round caps, continuous vents, or strip vents depending on the base product
  • Reduces the chance of nesting materials blocking airflow over time

Insect-screen soffit vent cons:

  • Fine mesh can reduce NFA slightly compared with an open vent of the same size
  • Mesh needs periodic inspection for debris buildup

Best for: rural and wooded properties where insect and rodent entry through the soffit is the main risk.

Verdict: Buy for wooded or rural lots; Skip if the property is urban with low pest pressure.

Find the right soffit vent

Browse Dundas Jafine’s venting and air distribution product line.

How we ranked

Each soffit vent type is scored against the six criteria above: net free area, retrofit versus new-construction fit, insect and rodent exclusion, material compatibility, weather resistance, and code compliance against the 1:150 or 1:300 ventilation ratio.

No type wins on every criterion, and that's the point. A round retrofit cap and a continuous strip solve different problems, so the ranking sorts by job, not by a single overall score. Dundas Jafine's own soffit vent cap made this list because it genuinely fits the retrofit use case, not because Dundas Jafine manufactures it.

Which soffit vent should you choose in 2026?

If you're retrofitting ventilation into a house that already has finished soffit, Dundas Jafine soffit vent caps are the practical pick: no panel removal, no re-siding. If the soffit is already off the house for other work, run continuous soffit vents the full length of the eave and size the NFA against the 1:150 ratio. Builders on new construction should default to pre-vented soffit panels and skip the separate vent-install step entirely.

For narrow overhangs, drop to rectangular strip vents, and add insect-screen soffit vents wherever the property backs onto woods or open land. Whichever soffit vent you land on for 2026, confirm the total NFA across all your vents actually meets your local code minimum — a vent that looks right and under-delivers on NFA leaves the attic exactly as under-ventilated as no vent at all.

FAQ

What’s the best soffit vent for an older house?

Dundas Jafine soffit vent caps are usually the best soffit vent for an older house because they retrofit into a single cutout without removing the existing soffit panel. Continuous vents work too, but require a full-length cut that’s more invasive on finished siding.

Is a continuous soffit vent better than a round vent cap?

Neither is universally better; continuous soffit vents deliver more even airflow across a whole eave, while round vent caps retrofit into existing soffit without removing panels. Choose based on whether the soffit is already off the house.

How much net free area does a soffit vent need?

Most building codes require a 1:150 net free area ratio between total vent NFA and attic floor area, or 1:300 when a vapor barrier is installed. Calculate the attic square footage first, then divide by the ratio to get the required NFA in square inches.

Can you mix soffit vent types on the same house?

Yes, mixing types is common — a continuous vent on one wing of a roof and retrofit caps on an addition, for example, still counts toward total attic NFA. What matters is the combined net free area, not uniformity of vent type.

Do soffit vents need insect screens?

Insect screens matter most on wooded or rural properties where bees, wasps, and rodents regularly try to enter through open soffit vents. Urban properties with low pest pressure can often skip the extra screening without issue.

What’s the difference between a soffit vent and a ridge vent?

A soffit vent is the intake side of attic ventilation, drawing in outside air at the eave, while a ridge vent is the exhaust side at the roof peak. Both sides need to be sized together or the system underperforms.

Can soffit vents be installed on vinyl soffit?

Yes, soffit vent caps, continuous vents, and strip vents are all available in profiles compatible with vinyl soffit as well as aluminum and wood. Match the vent profile to the existing soffit material before cutting.

One last thing

A soffit vent only does half the job. Adding intake air without matching exhaust ventilation at the ridge or roof deck just shifts the bottleneck — the attic still can't move air efficiently. Before buying any soffit vent for a 2026 retrofit, check what exhaust ventilation the roof already has; an oversized intake paired with undersized exhaust performs about the same as no upgrade at all.